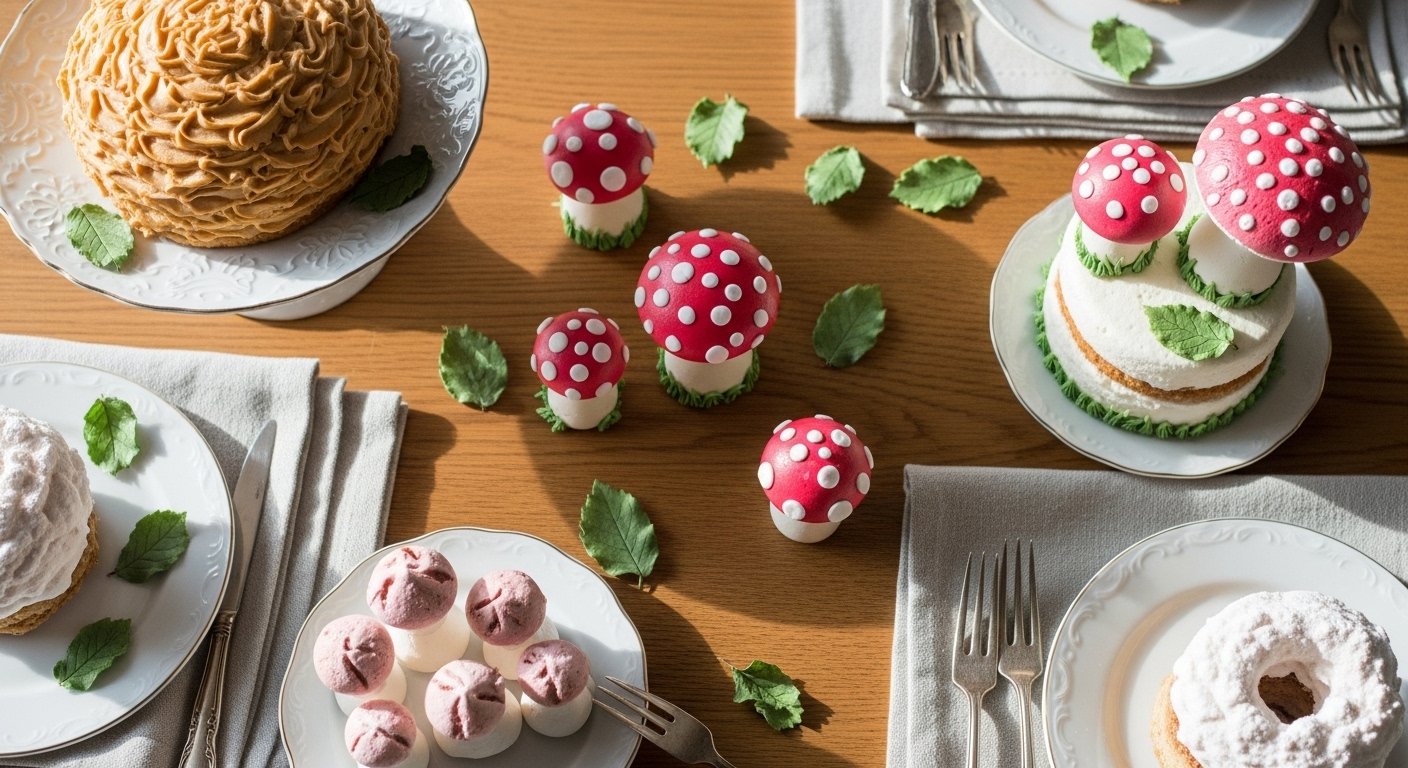
You’re about to explore 29 enchanting mushroom cake decoration ideas perfect for storybook dessert tables. These designs range from simple buttercream toadstools to sculpted fondant mushrooms, each with practical steps you can try today.
You’ll find realistic ingredients, easy instructions, and helpful tool tips so your cake table looks magical without stress.
Pick a style, gather a few tools, and have fun crafting tiny edible fungi.
29 Gorgeous Mushroom Cake Decoration Ideas For Storybook Dessert Tables
Here are 29 mushroom decoration recipes—from quick toppers to full sculpted mushrooms—so you can mix and match looks for parties and photo-ready spreads.
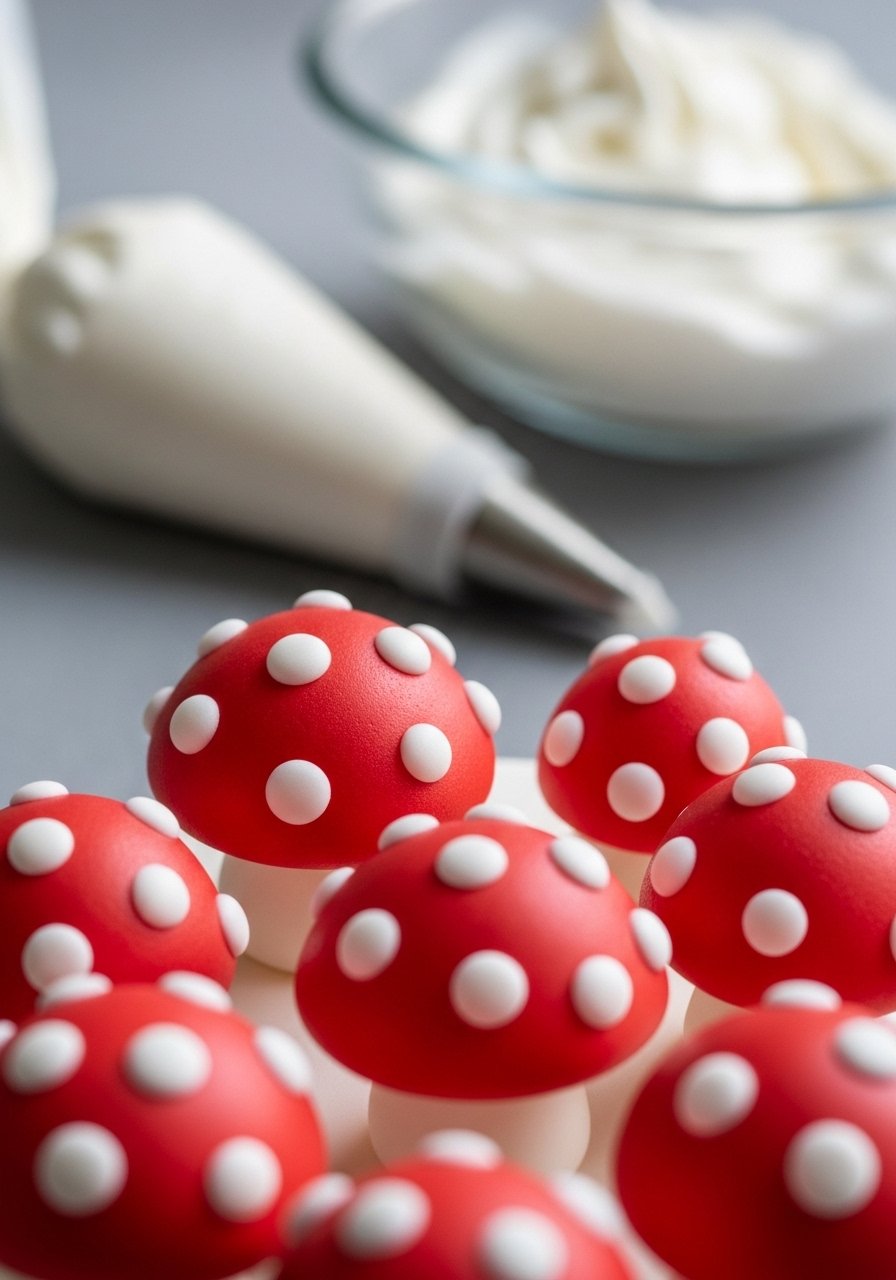
1. Classic Buttercream Toadstools
A soft, creamy buttercream topper with bright red caps and white dots. Light, sweet, and quick—perfect for beginners who want a storybook look in minutes.
Ingredients
- 2 cups buttercream (stiff) chilled for piping
- Red gel food coloring (small amount)
- White royal icing or stiff buttercream for dots
- Piping bag with small round tip (size #3–4)
- Toothpicks or wooden skewers for support
Step-by-Step Instructions
- Color your buttercream: Mix red gel into 1 cup of buttercream until vivid. Keep remaining white.
- Pipe stems: Use white buttercream in a bag fitted with a round tip. Pipe short cone shapes on parchment. Chill 10–15 minutes to firm.
- Add caps: Pipe red domes on top of stems. Smooth with a small offset spatula if needed. Chill 10 minutes.
- Dot the caps: Use royal icing or stiff white buttercream in a tiny round tip to add white dots. Set for 30 minutes before moving.
- Attach to cake: Use a toothpick to anchor each topper into the frosted cake gently.
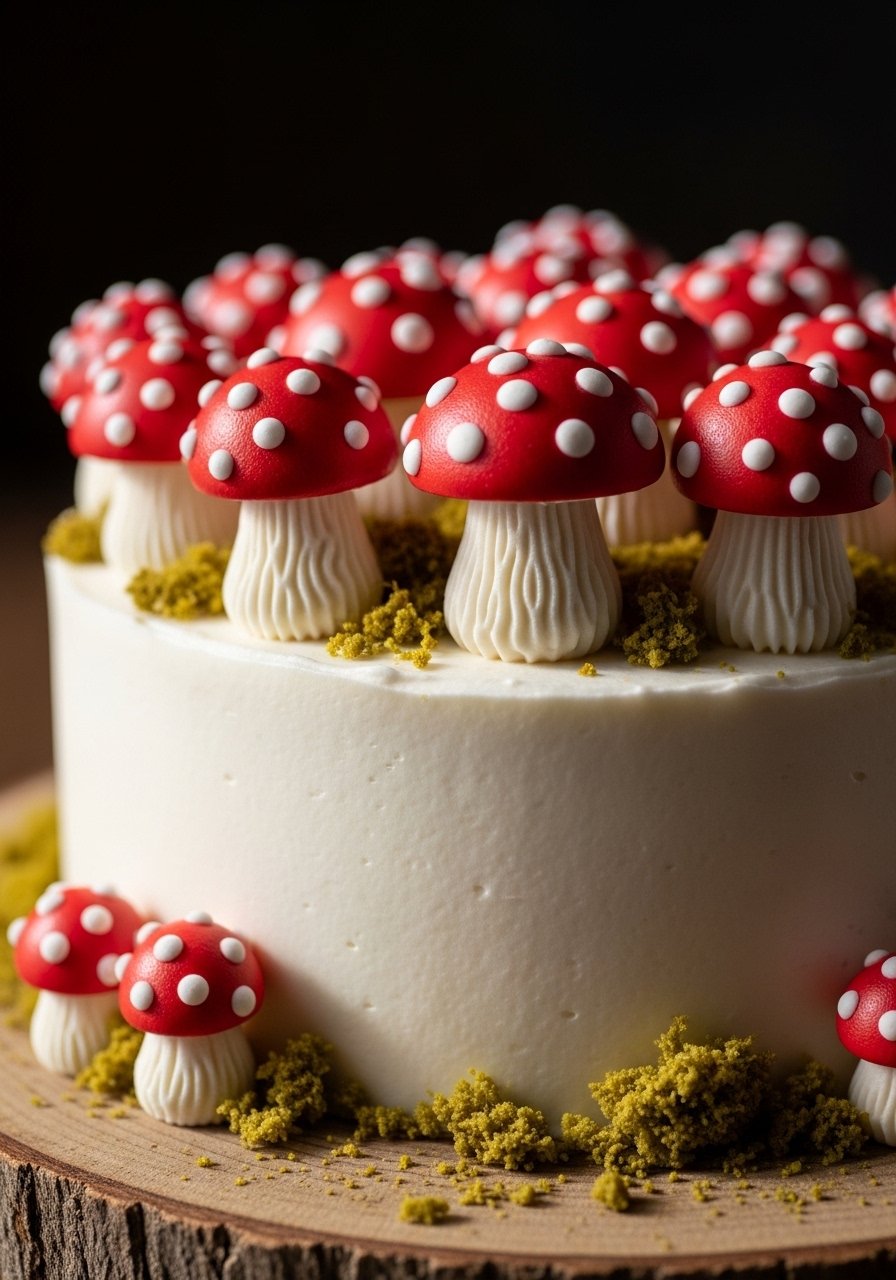
2. Fondant Little Mushrooms
Smooth, sculpted fondant mushrooms give a polished storybook feel. They’re sturdy and reusable for multiple cakes or table accents.
Ingredients
- 8 oz white fondant
- 4 oz red fondant
- Cornstarch for dusting
- Small round cutter or knife
- Toothpicks
Step-by-Step Instructions
- Prepare fondant: Knead white fondant until pliable. Dust surface with cornstarch.
- Shape stems: Roll white fondant into short cylinders and taper slightly at one end. Set on parchment.
- Form caps: Roll red fondant into balls, flatten into discs, and shape into domes. Trim base if needed.
- Assemble: Insert toothpick halfway into stem, press cap over toothpick to join. Snip off excess.
- Add dots: Roll tiny white fondant balls, press gently onto caps. Let dry 12–24 hours.
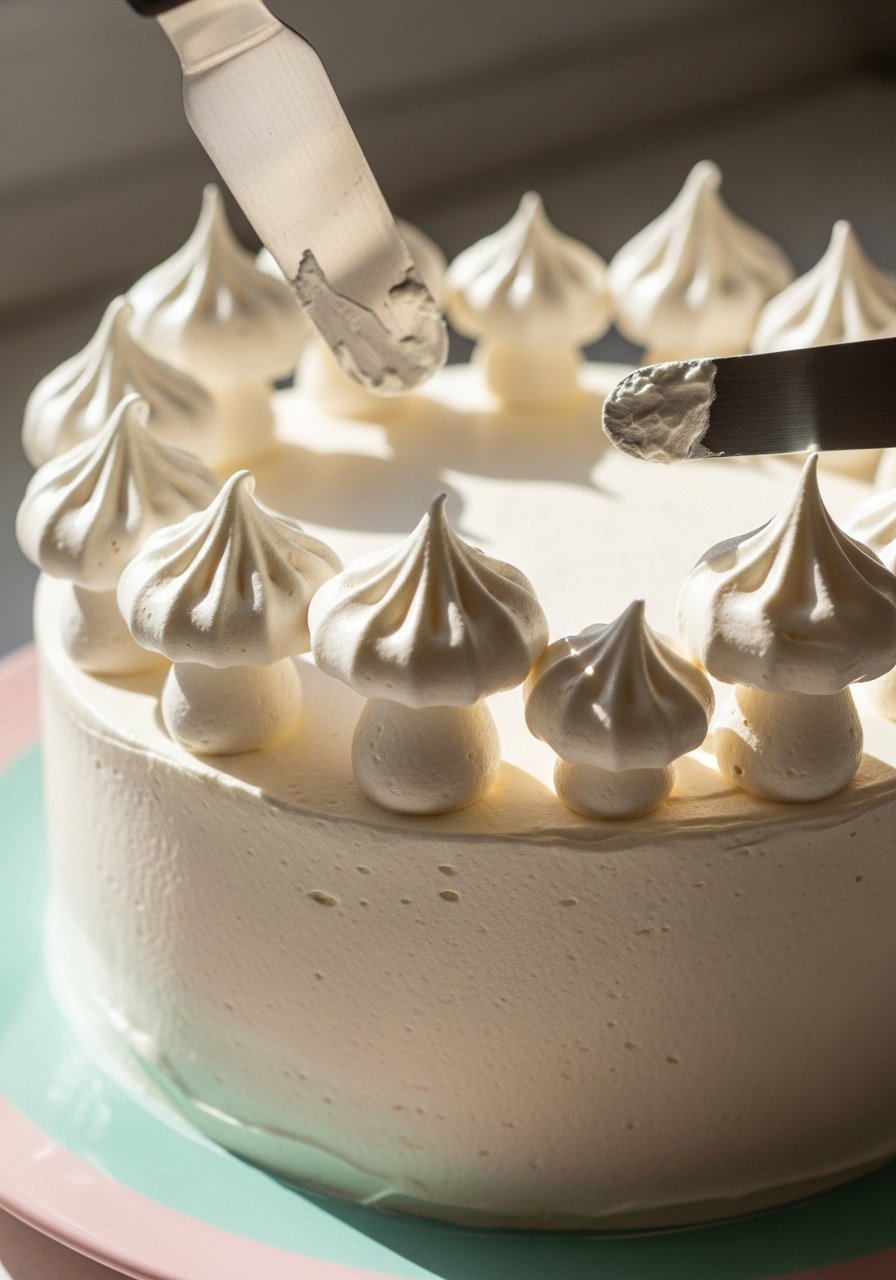
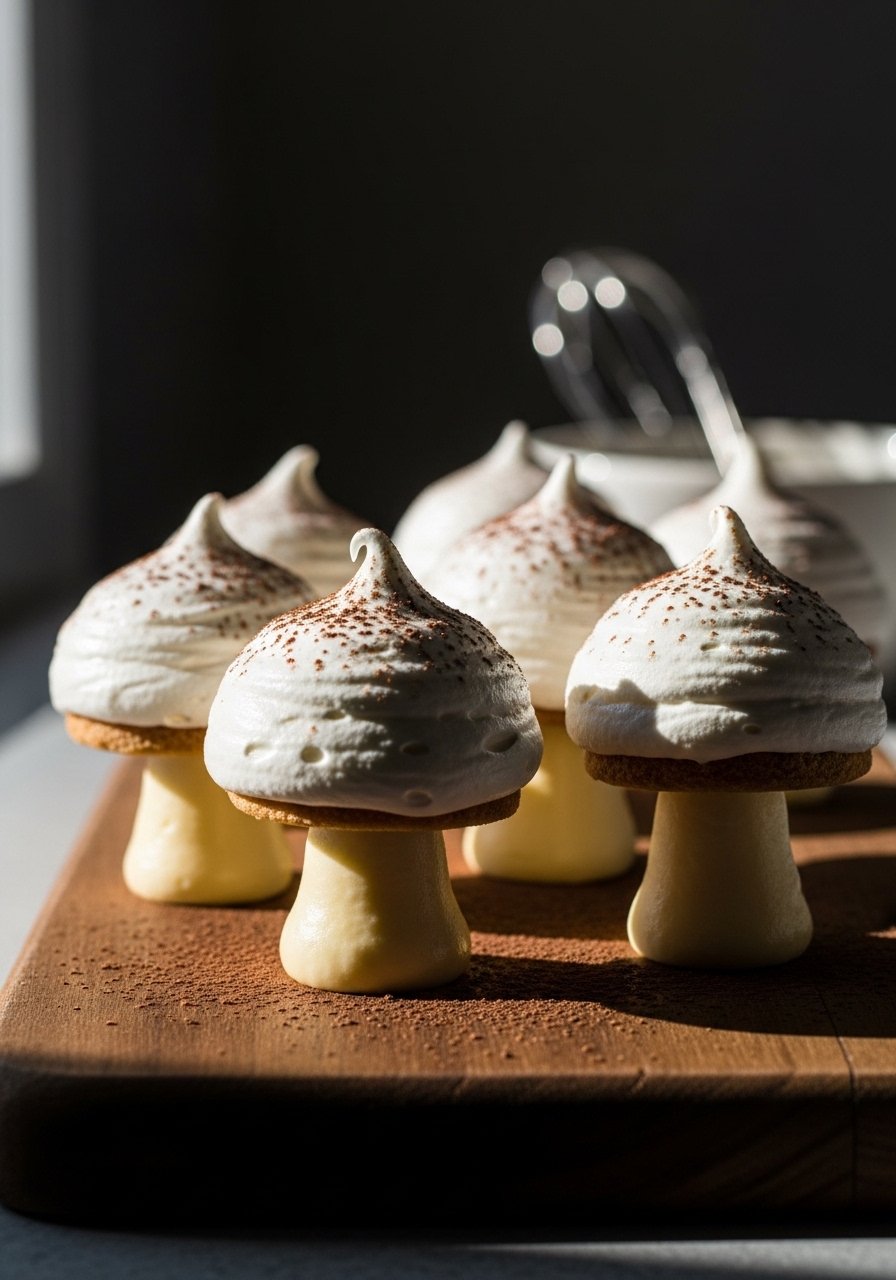
3. Meringue Mushroom Toppers
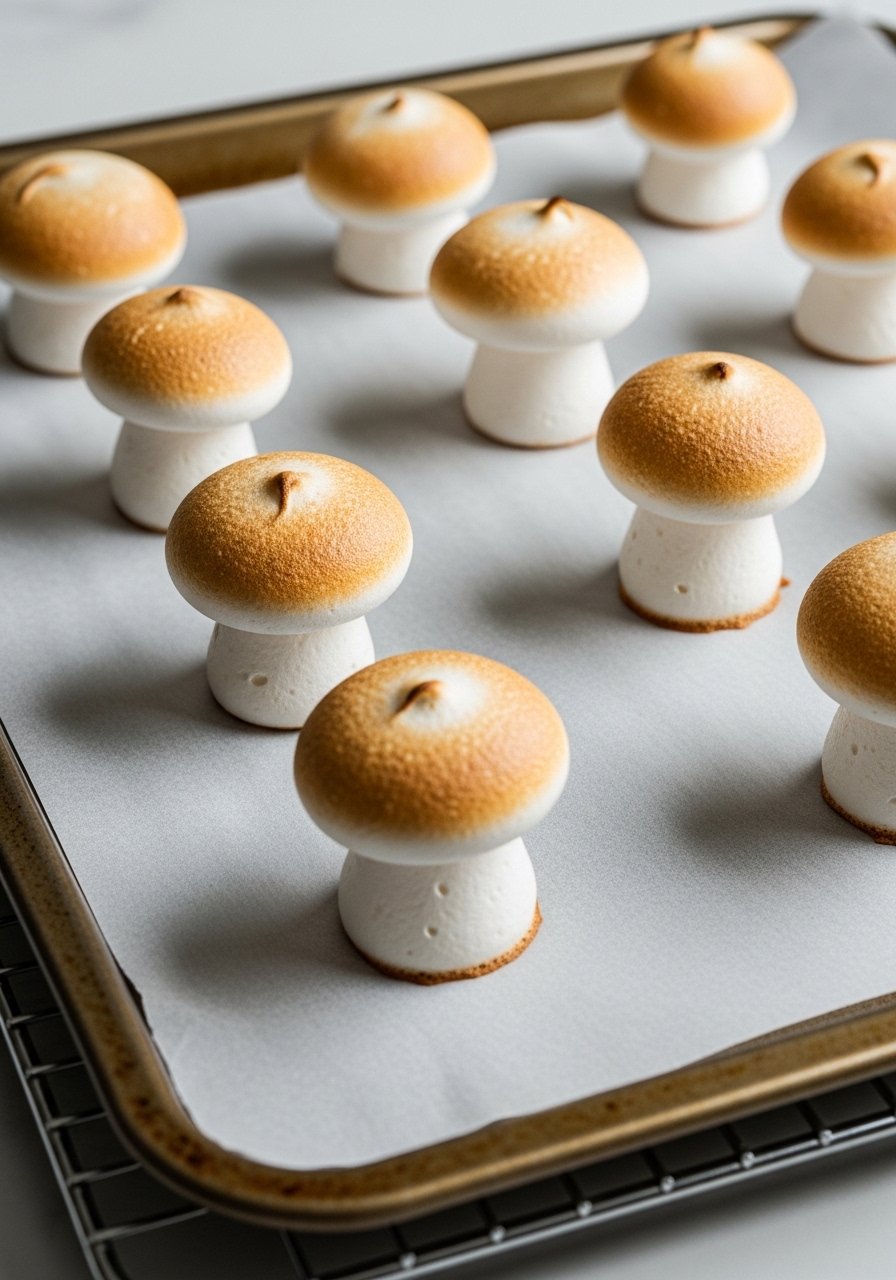
Light and crunchy, meringue mushrooms are delicate and adorable. They add texture and a fairytale crunch to cake edges.
Ingredients
- 3 large egg whites, room temp
- 3/4 cup superfine sugar
- Pinch of cream of tartar
- Cocoa powder (for dusting)
- Piping bags with round and star tips
Step-by-Step Instructions
- Whip whites: Beat egg whites with cream of tartar until soft peaks. Gradually add sugar until stiff glossy peaks form.
- Pipe stems and caps: Use round tip for stems and star tip for caps on parchment. Pipe small caps slightly larger than stems.
- Bake low and slow: Bake at 200°F (95°C) for 1½–2 hours until dry. Turn oven off and cool inside to avoid cracks.
- Finish caps: Dust underside of caps with cocoa powder for earthy look. Attach caps to stems with a dab of melted chocolate.
- Store carefully: Keep in an airtight container until use to preserve crispness.
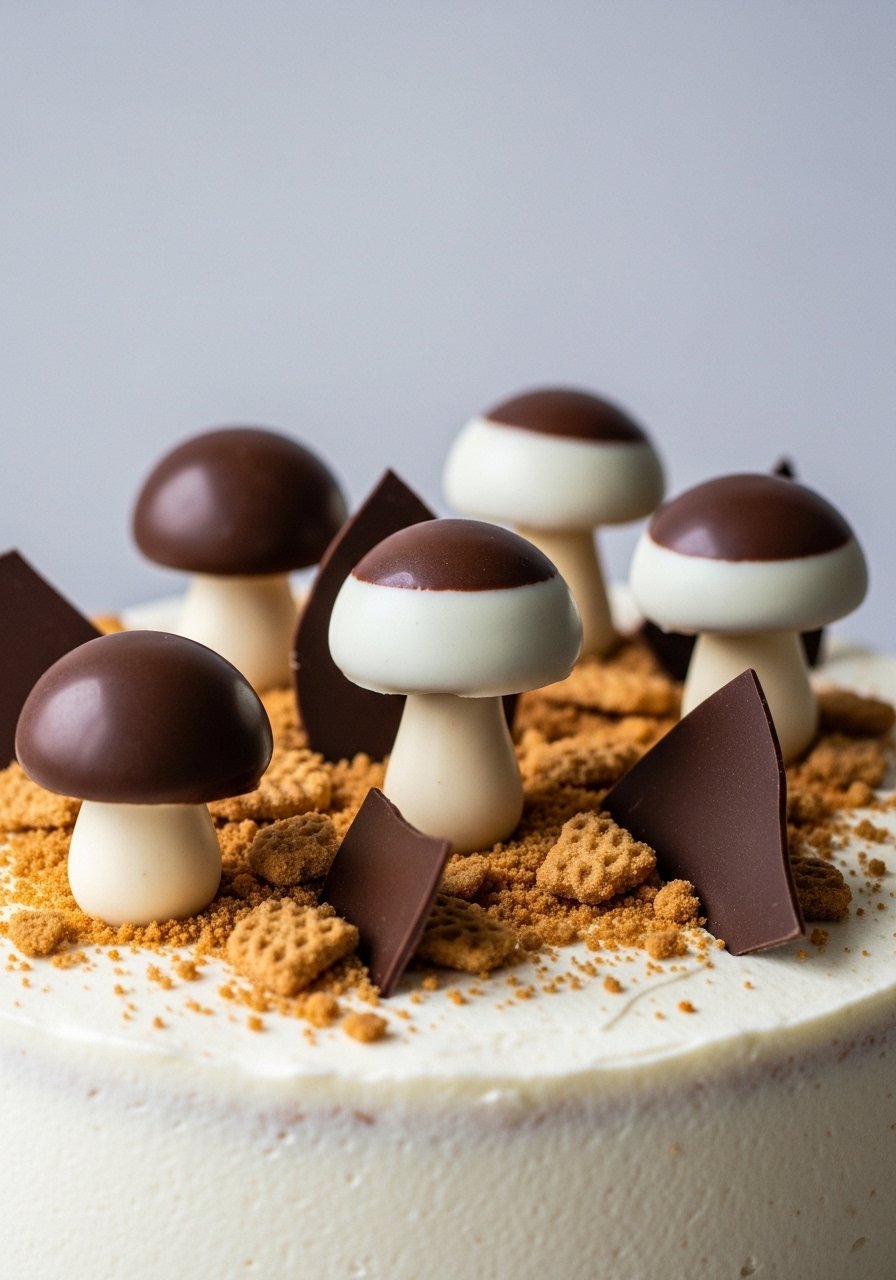
4. Chocolate Dome Mushrooms
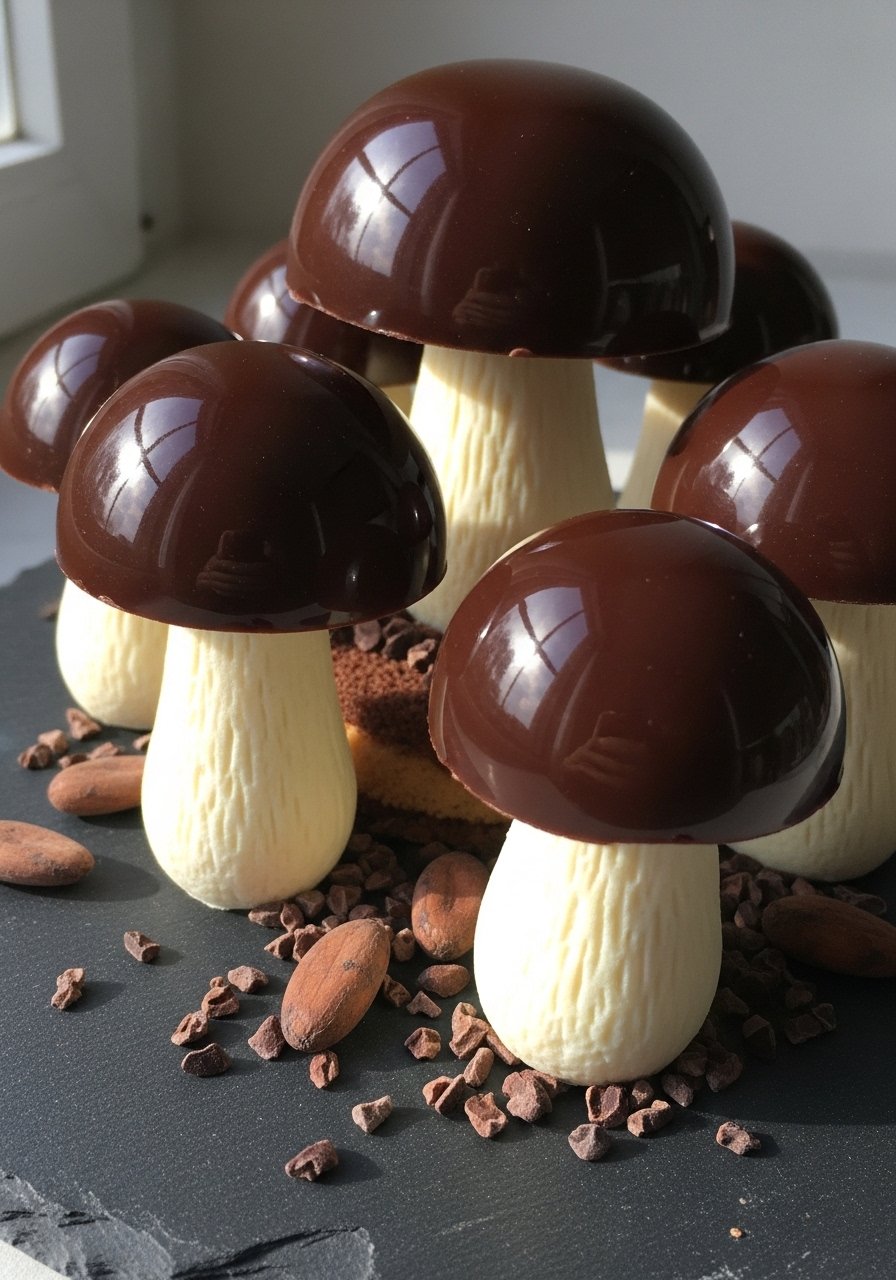
Decadent and dramatic, these chocolate mushrooms combine tempered chocolate caps with creamy white chocolate stems—rich and elegant.
Ingredients
- 8 oz dark chocolate, tempered
- 6 oz white chocolate, melted
- Silicone hemisphere moulds
- Parchment paper
Step-by-Step Instructions
- Temper dark chocolate: Melt and temper per package or use microwave method—melt to 115°F, cool to 82°F, reheat to 88–90°F.
- Mould caps: Brush tempered dark chocolate into silicone hemispheres; chill 10–15 minutes. Repeat for an even shell.
- Make stems: Pipe melted white chocolate into small cone shapes on parchment and chill until set.
- Assemble: Peel domes from moulds and place over stems, using a little melted chocolate as glue.
- Chill & store: Refrigerate 10 minutes, then bring to room temperature before placing on cake.
5. Marzipan Forest Fungi

Almondy and slightly chewy, marzipan mushrooms are flavorful and easy to shape for a vintage, edible storybook display.
Ingredients
- 8 oz marzipan
- Almond extract (1/2 tsp)
- Pink gel color
- Powdered sugar for dusting
Step-by-Step Instructions
- Flavor & color: Knead almond extract and a tiny amount of pink gel into marzipan.
- Form stems: Roll small pieces into tapered white stems.
- Create caps: Roll colored marzipan into balls, flatten into caps, and press over stems.
- Texture & dust: Use a toothpick to add speckles, dust lightly with powdered sugar for a matte finish.
- Set aside: Rest 2–4 hours at room temperature before placing on cake.
6. Wafer Paper Mushroom Caps
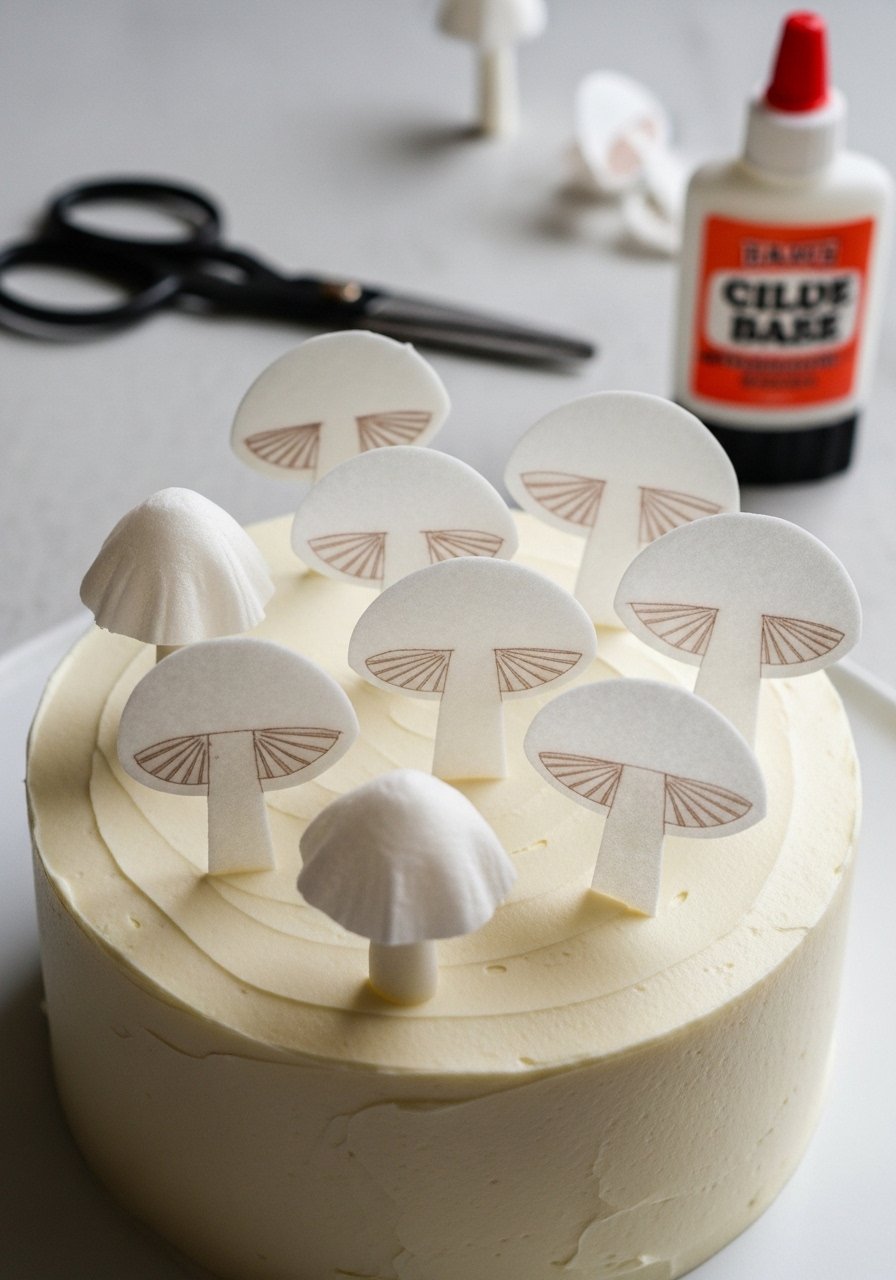
Light and translucent, wafer paper caps add an ethereal quality. They’re ideal for delicate, layered displays and hold up well at room temperature.
Ingredients
- Wafer paper sheets
- Edible glue or water
- Petal dust for shading
- Small scissors and shaping tool
Step-by-Step Instructions
- Cut shapes: Trim wafer paper into round caps using scissors or a small cutter.
- Shape: Lightly dampen with edible glue and drape over a curved form or small bowl to shape. Let dry 15–30 minutes.
- Dust color: Add petal dust around edges for depth.
- Attach stems: Use a small dab of royal icing or buttercream to glue caps onto stems.
- Place on cake: Insert gently; wafer paper is fragile—handle with care.
7. Candy Melt Mushroom Lollipops
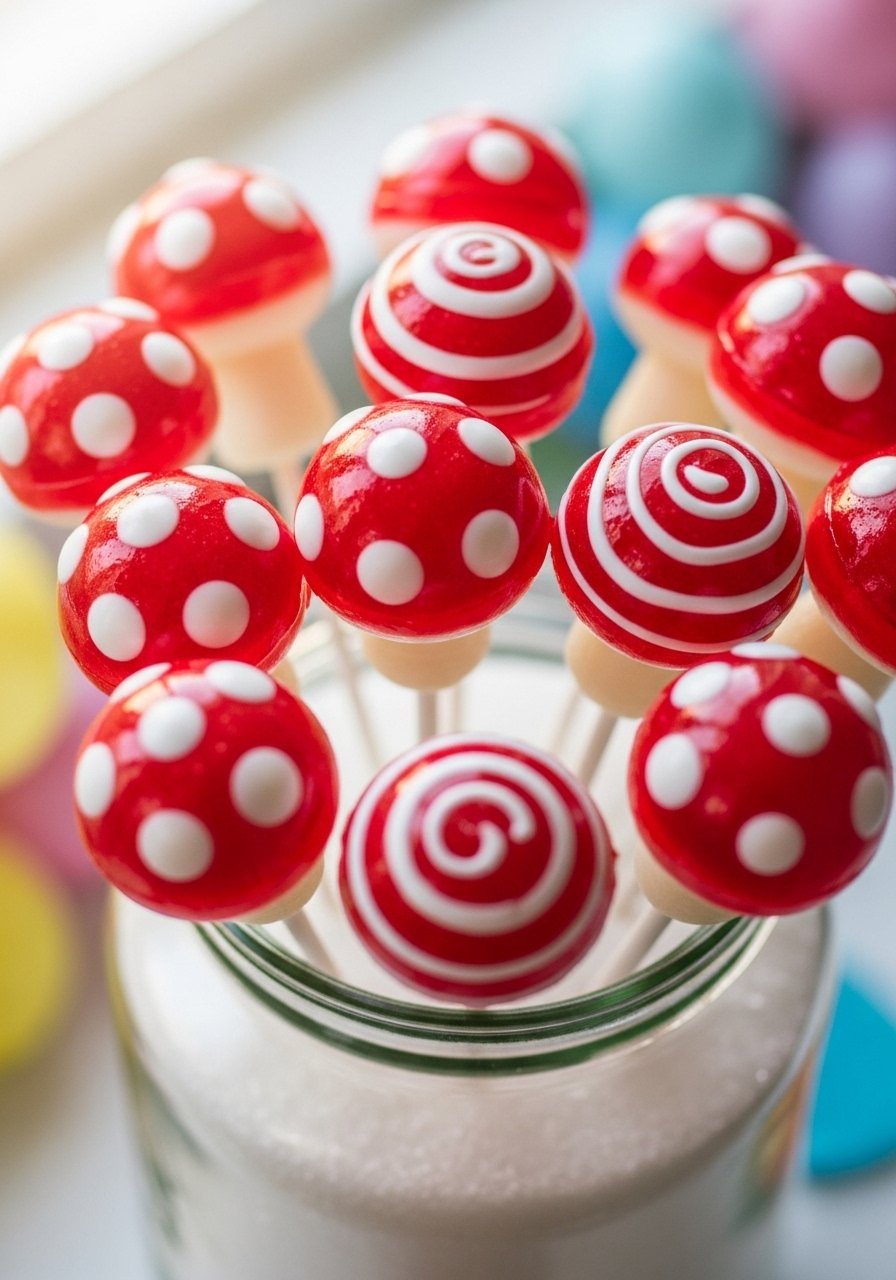
Fun and kid-friendly, candy-melt mushroom lollipops are quick to make and double as edible favors or cake toppers.
Ingredients
- 12 oz candy melts (red and white)
- Lollipop sticks
- Parchment paper
- Small piping bag
Step-by-Step Instructions
- Melt candy: Melt candy melts per package instructions until smooth.
- Form caps: Drop spoonfuls of red candy on parchment and create dome shapes; insert stick while soft. Chill 5–10 minutes.
- Make stems: Pipe white candy into short stems beside caps or mold separately. Chill.
- Assemble: Attach stems to caps with a dab of melted candy.
- Finish: Let set fully at room temp, then store in a cool place.
8. Painted Buttercream Mushrooms
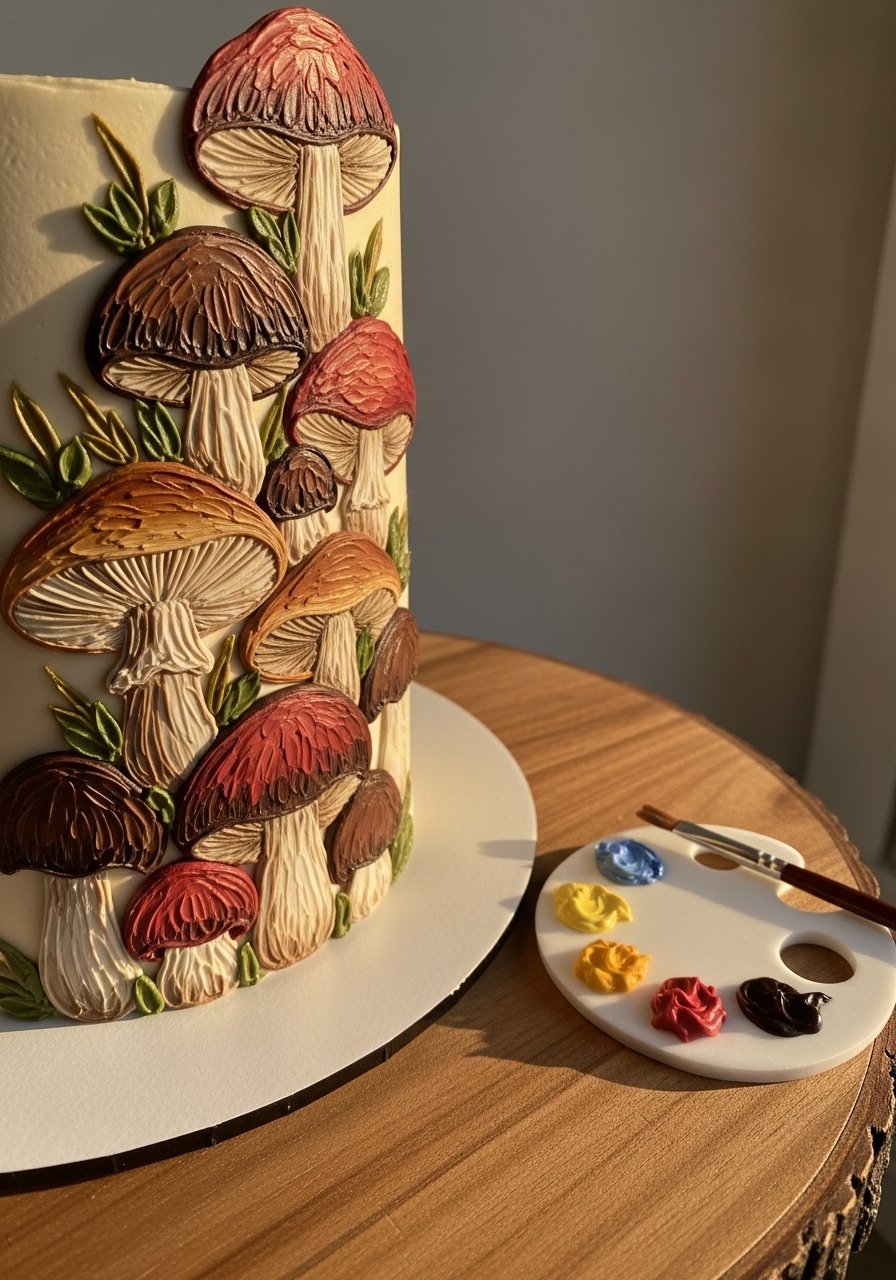
These mushrooms use tinted buttercream and a small brush to paint cap details—perfect for an artistic, storybook vibe.
Ingredients
- 2 cups buttercream (soft)
- Gel food colors (red, brown)
- Small food-safe paint brushes
- Turntable (optional)
Step-by-Step Instructions
- Tint buttercream: Divide into small bowls and tint red and light brown for shading.
- Pipe basic shapes: Pipe small domes for caps and short stems. Chill briefly to set.
- Paint details: Thin colored buttercream slightly and use a brush to add shadows and spots.
- Blend: Use a clean dry brush to soften edges for a watercolor look.
- Set: Chill 10–15 minutes before transferring.
9. Edible Wafer-Printed Mushroom Images
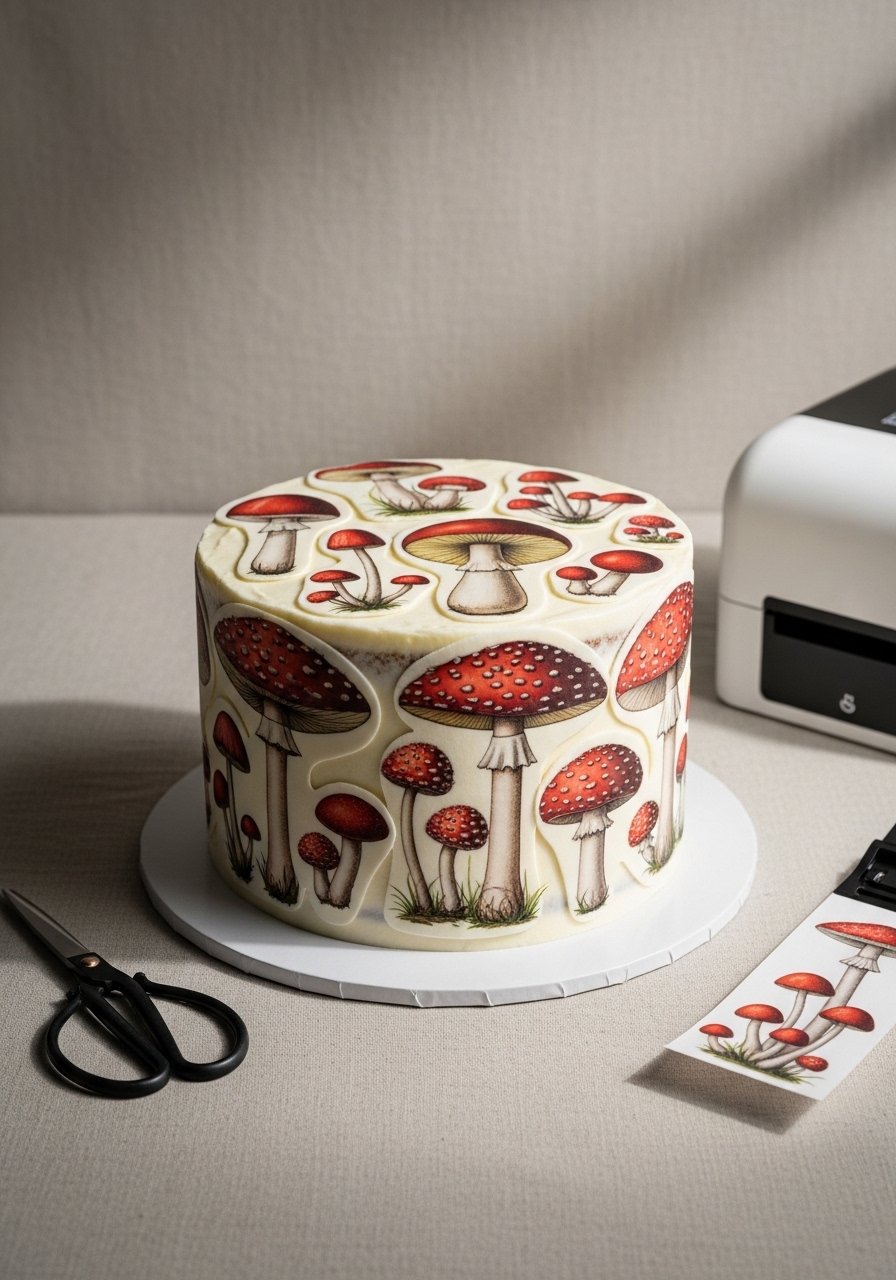
Printed edible wafer images let you reproduce detailed mushroom art quickly—great for storybook themes with intricate designs.
Ingredients
- Edible wafer sheets or frosting sheets
- Edible ink printer or printed sheets
- Small scissors and edible glue
Step-by-Step Instructions
- Print designs: Print mushroom illustrations onto edible sheets using edible ink or order prints.
- Cut shapes: Trim each mushroom carefully with small scissors.
- Apply to cake: Use edible glue or a thin swipe of buttercream to adhere images to fondant or buttercream.
- Seal edges: Smooth edges gently with a clean fingertip or brush to remove air bubbles.
- Finish: Add piped details around printed pieces for a layered look.
10. Chocolate-Dipped Meringue Mushrooms
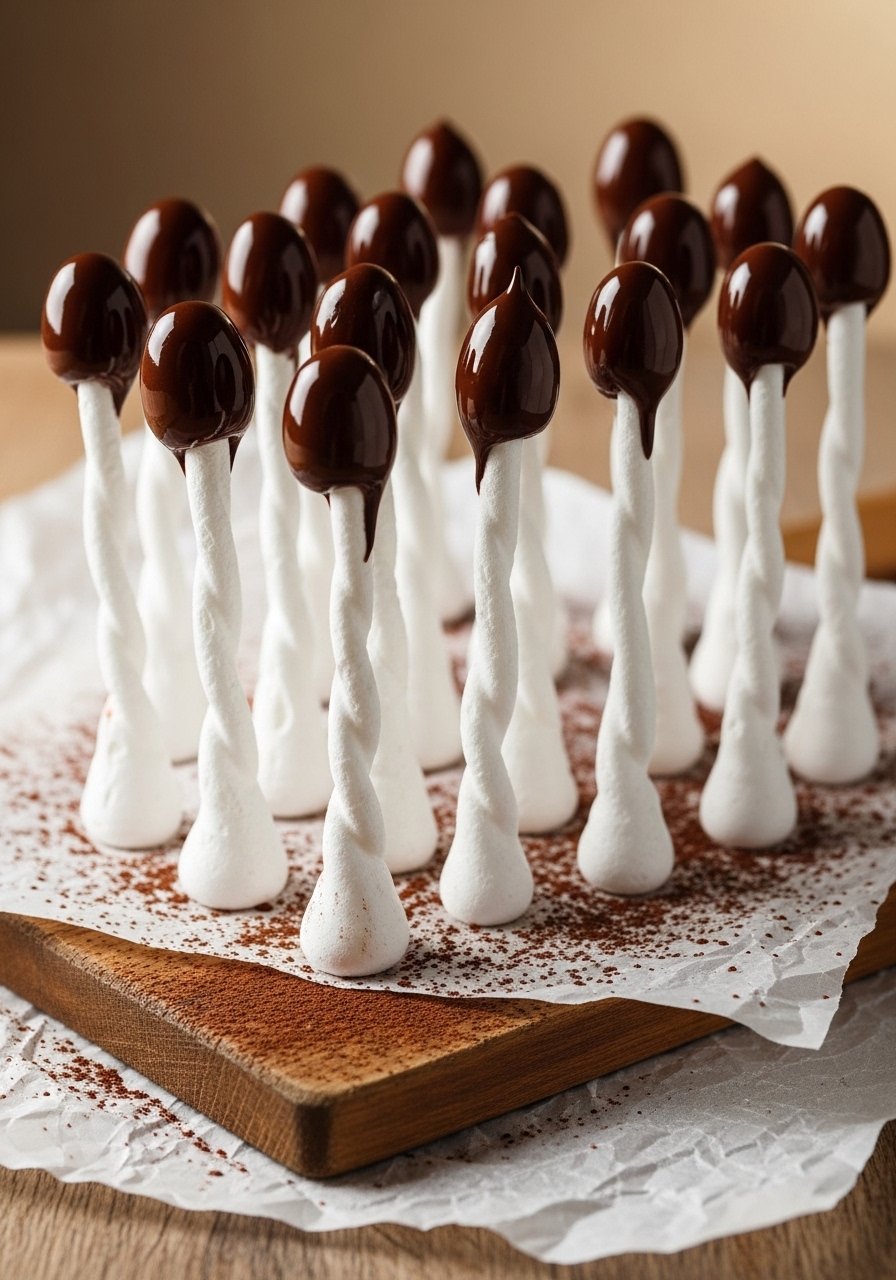
A twist on classic meringue mushrooms—dip caps in chocolate for a two-tone finish that resists humidity better than plain meringue.
Ingredients
- 3 egg whites
- 3/4 cup superfine sugar
- 4 oz dark chocolate, melted
- Piping bags and tips
Step-by-Step Instructions
- Make meringue: Whisk egg whites and sugar to stiff peaks.
- Pipe stems & caps: Pipe stems and caps separately on parchment. Bake at 200°F (95°C) for 1½ hours. Cool in oven.
- Dip caps: Dip cooled caps into melted dark chocolate and set on parchment.
- Assemble: Use a dot of melted chocolate to fix caps onto stems.
- Store: Keep airtight until use to maintain crispness.
11. Royal Icing Mushroom Appliqués

Flat appliqués are easy to attach to fondant-covered cakes or cookies—great for a clean, illustrated storybook look.
Ingredients
- 2 cups royal icing (stiff)
- Gel colors (red, white)
- Piping bags with small round tips
- Parchment paper or silicone mat
Step-by-Step Instructions
- Color icing: Divide and tint a portion red for caps.
- Pipe outlines: Outline mushroom shapes in white and red on parchment. Let crust 10 minutes.
- Flood shapes: Thin icing slightly and flood inside outlines for a smooth finish.
- Dry thoroughly: Allow to dry 6–8 hours or overnight.
- Attach: Use a dab of royal icing to glue appliqués onto cake.
12. Mini Pavlova Mushrooms
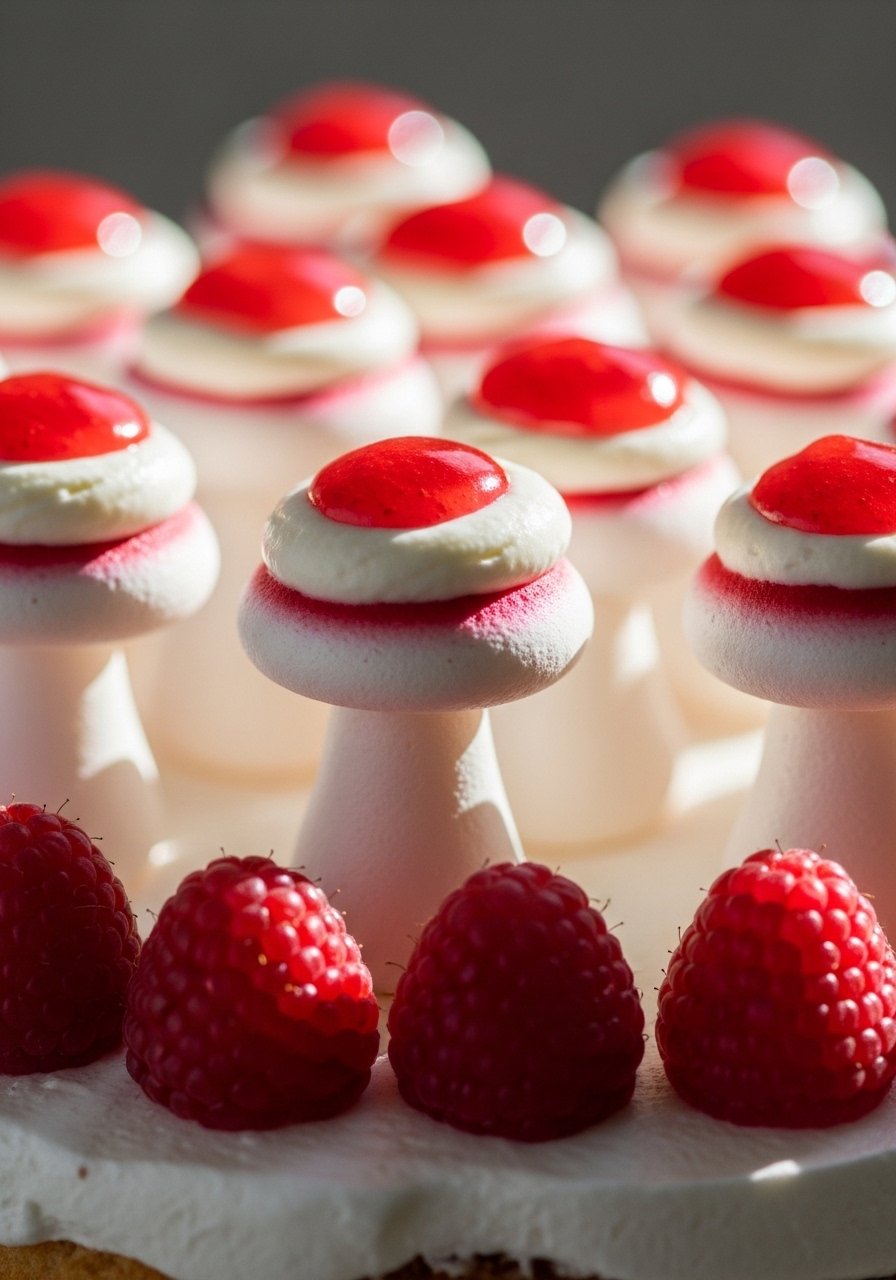
Crisp outside and marshmallowy inside, mini pavlova mushrooms are airy and pair wonderfully with fruit glazes for bright caps.
Ingredients
- 3 egg whites
- 3/4 cup caster sugar
- 1 cup whipped cream
- Fruit puree or jam for glaze
Step-by-Step Instructions
- Whip and bake: Beat whites with sugar to stiff peaks. Pipe small meringue nests and bake 200°F (95°C) 1½ hours. Cool in oven.
- Top with cream: Pipe whipped cream into nests to form stems.
- Glaze caps: Warm fruit puree or jam and brush over small dollops to create colorful caps.
- Assemble on cake: Place on cake just before serving to keep meringue crisp.
- Serve promptly: Pavlovas soften over time—display shortly before guests arrive.
13. Rice Krispie Treat Mushroom Stems
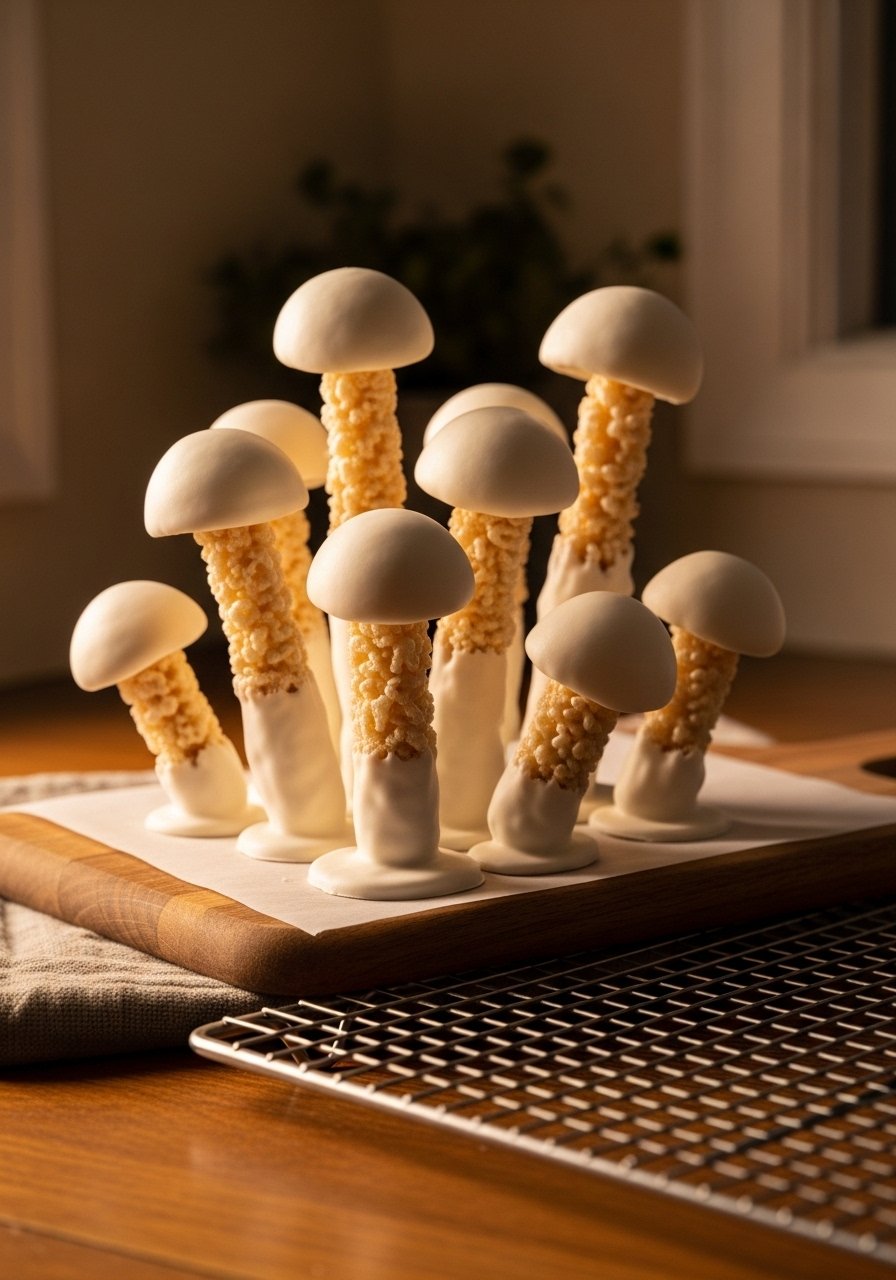
Quick and substantial, rice krispie treat stems are sturdy and kid-friendly—great for larger display mushrooms.
Ingredients
- 4 cups mini marshmallows
- 3 tbsp butter
- 6 cups crisp rice cereal
- White chocolate for coating
Step-by-Step Instructions
- Make treats: Melt butter and marshmallows over low heat; stir in cereal. Press into a pan and cool.
- Shape stems: Cut into small cones or cylinders and trim.
- Coat in chocolate: Dip in melted white chocolate for a smooth finish. Chill to set.
- Add caps: Attach fondant or chocolate caps with melted chocolate.
- Stabilize on cake: Insert dowel or skewer if making tall toppers.
14. Swiss Meringue Buttercream Toadstools
Silky Swiss meringue buttercream makes smooth, elegant mushrooms with a professional finish—less sweet than American buttercream.
Ingredients
- 4 large egg whites
- 1 cup sugar
- 2 cups unsalted butter, softened
- Gel food coloring
Step-by-Step Instructions
- Make SMBC: Heat whites and sugar over simmering water to 160°F, whisk until dissolved. Whip to stiff peaks then add butter gradually.
- Color portions: Tint small portions red for caps and keep the rest white.
- Pipe stems & caps: Use round tips for stems and large round tips for caps. Pipe directly onto cake or parchment to chill.
- Texture caps: Use a small spatula to smooth caps and add dots with white SMBC.
- Chill before transport: Refrigerate 15–20 minutes to firm.
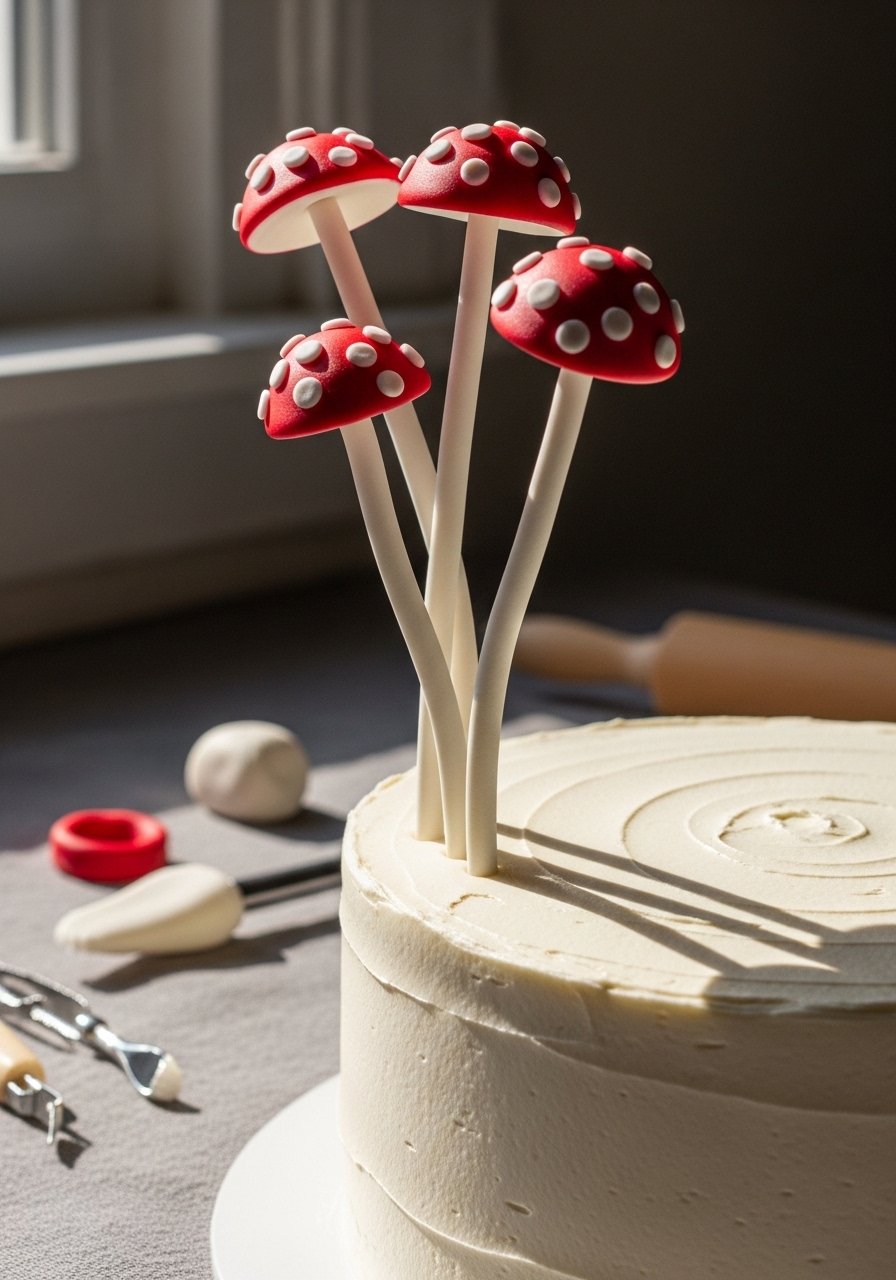
15. Sculpted Fondant Centerpiece Mushroom
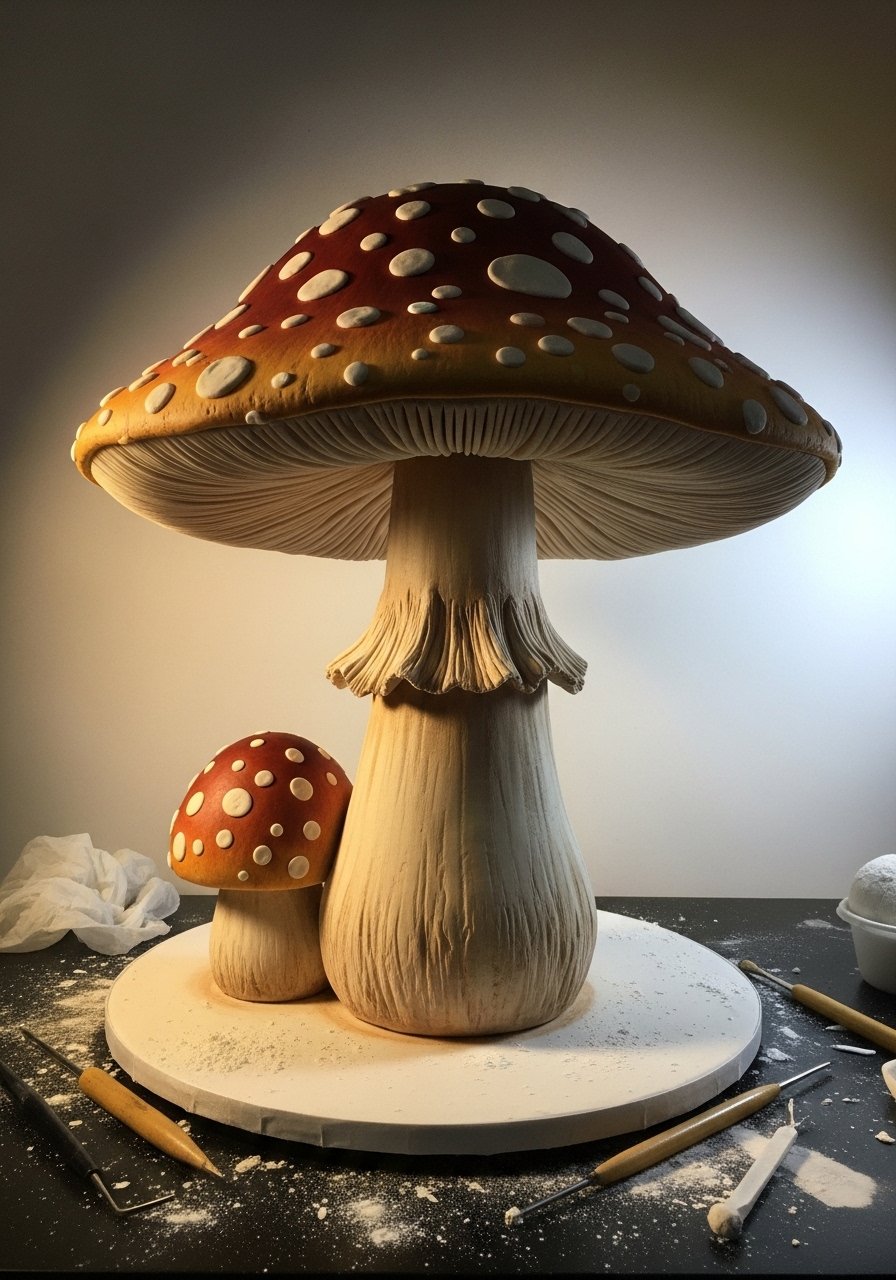
Create a showstopper: a sculpted fondant mushroom centerpiece with hand-painted details for maximum storybook drama.
Ingredients
- 16 oz fondant (white and colored)
- Tylose powder for firmness
- Edible petal dusts and brushes
- Modeling tools and internal support (wooden dowel)
Step-by-Step Instructions
- Mix tylose: Add 1–2 tsp tylose to fondant to speed drying and strengthen.
- Form base: Mold a large rounded stem around a wooden dowel anchored on the cake board. Let set slightly.
- Create cap: Roll colored fondant into a dome and drape over form, smoothing and trimming.
- Add details: Use sculpting tools to create gills underneath and paint spots with edible dusts.
- Dry & place: Allow 24 hours to firm before moving to the cake.
16. White Chocolate Ganache Mushrooms
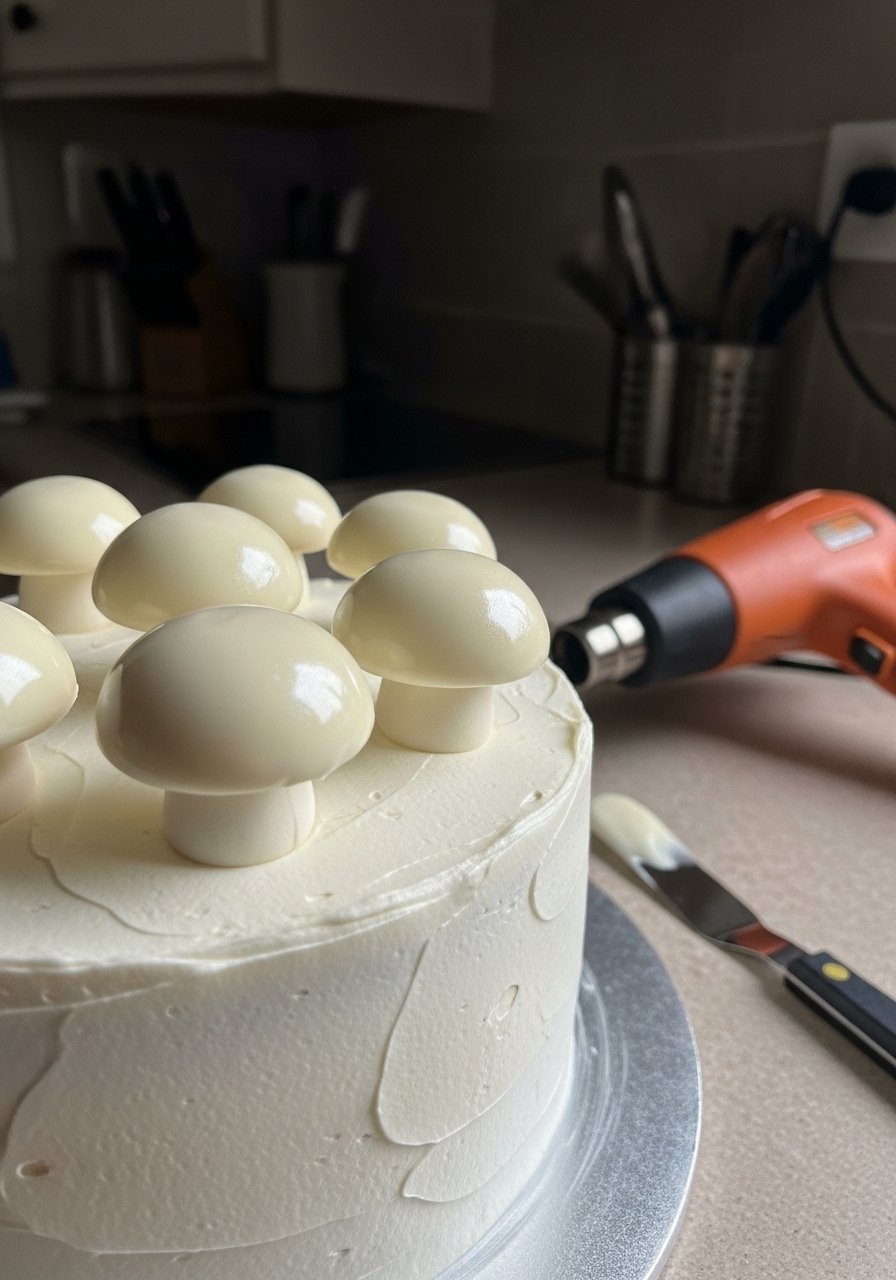
Creamy white chocolate ganache caps are silky and glossy. They’re quick to make and give a refined, modern twist to mushroom toppers.
Ingredients
- 10 oz white chocolate
- 1/2 cup heavy cream
- Cocoa butter or shortening (optional for shine)
Step-by-Step Instructions
- Make ganache: Heat cream to simmer, pour over chopped white chocolate, stir until smooth. Add a little cocoa butter for extra sheen.
- Chill to pipeable: Cool ganache until thick but still pipeable (about 15–20 minutes in fridge).
- Pipe caps: Pipe domes onto parchment and chill to set.
- Form stems: Use fondant or white chocolate for stems and attach with a dab of ganache.
- Polish: Brush lightly with melted cocoa butter for extra gloss if desired.
17. Candy-Coated Wafer Mushrooms
Crisp wafer bases coated in candy colors create sweet, crunchy mushroom caps that are light and very colorful.
Ingredients
- Wafer cookies or discs
- 8 oz candy melts (various colors)
- Sprinkles or edible dust for speckles
Step-by-Step Instructions
- Melt candy melts: Prepare colors in separate bowls per package instructions.
- Coat wafers: Dip wafers into colored melts, tap off excess, place on parchment.
- Add speckles: While wet, sprinkle with edible dust or tiny sprinkles for texture.
- Attach stems: Use royal icing or melted chocolate to glue stems under caps.
- Set & use: Let set fully before placing on cake.
18. Whipped Ganache Mushroom Tops
Whipped ganache gives a light, mousse-like cap with a sophisticated taste. It’s ideal for slightly more delicate, grown-up displays.
Ingredients
- 8 oz dark chocolate
- 1 cup heavy cream
- 1 tsp vanilla extract
Step-by-Step Instructions
- Make ganache: Heat cream, pour over chopped chocolate and stir smooth. Chill until thick but still scoopable.
- Whip: Whip chilled ganache to soft peaks. Add vanilla.
- Pipe caps: Use a large round tip to pipe domes. Chill to stabilize.
- Pair with stems: Use buttercream or white chocolate stems to anchor.
- Serve cool: Keep refrigerated if assembled in advance.
19. Choux Pastry ‘Shroom Puffs

Make small cream-puff stems with choux pastry and top with disk-shaped choux caps for a bakery-style mushroom.
Ingredients
- 1 cup water
- 1/2 cup butter
- 1 cup flour
- 4 eggs
- Powdered sugar for dusting
Step-by-Step Instructions
- Make choux: Bring water and butter to a boil, stir in flour, cook 2 minutes. Cool briefly, beat in eggs until glossy.
- Pipe shapes: Pipe small cones for stems and flatter rounds for caps on a lined baking sheet.
- Bake: 400°F for 10 minutes, reduce to 350°F (175°C) for 20–25 minutes until golden and hollow.
- Fill (optional): Fill with pastry cream or whipped cream using a small tip.
- Assemble: Dust with powdered sugar and stack caps over stems with a dab of glaze.
20. Gummy Candy Mushrooms

Gummy mushrooms are a fun, chewy option—great for casual tables or children’s parties, and they’re easy to arrange in clusters.
Ingredients
- Assorted gummy mushroom candies (store-bought)
- Small skewers or toothpicks (optional)
Step-by-Step Instructions
- Select candies: Choose a variety of colors and sizes for visual interest.
- Stabilize (optional): Insert short toothpicks into stems for stability on soft frosting.
- Arrange: Cluster gummies across cake top and edges for a whimsical forest effect.
- Combine textures: Pair with meringue or fondant mushrooms for contrast.
- Serve immediately: Gummies can become sticky in warm conditions—display close to serving time.
21. Piped Royal Icing Spots
Perfect for detail work: piped royal icing spots add crisp, raised texture to fondant or buttercream caps.
Ingredients
- 1 cup royal icing (stiff)
- Piping bag with very small round tip (#1–2)
- Red fondant or buttercream caps already formed
Step-by-Step Instructions
- Fill piping bag: Place stiff royal icing in a small bag with tiny round tip.
- Pipe dots: Steady your hand and pipe small dots onto caps. Keep pressure consistent.
- Dry: Let royal icing harden for at least 1–2 hours.
- Smooth mistakes: If a dot is uneven, scrape gently with a toothpick and re-pipe.
- Attach as needed: Use a tiny dab of icing to secure appliqués to cake.
22. Airbrushed Mushroom Shading
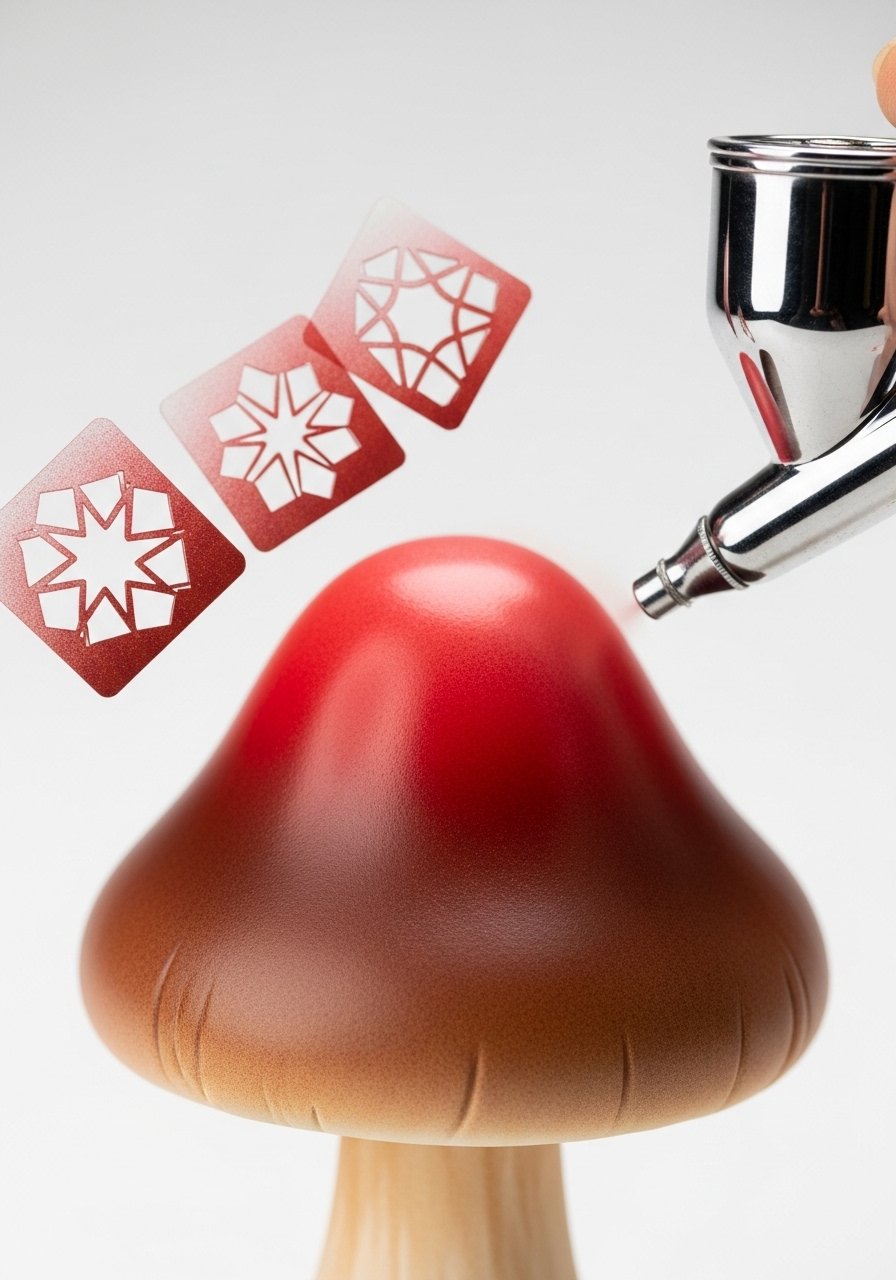
Airbrush shading adds realistic depth and gentle gradients—ideal for achieving natural-looking caps and shadowed gills.
Ingredients
- Food-safe airbrush and edible colors
- Small stencils (optional)
- Fondant or buttercream mushroom forms
Step-by-Step Instructions
- Prepare airbrush: Thin edible colors per manufacturer instructions and set up in a ventilated area.
- Practice sprays: Test spray on parchment to get comfortable with distance and pressure.
- Shade caps: Hold 6–8 inches away and build color gradually, darker on edges or center as desired.
- Add speckles: Use a toothbrush or splatter technique lightly for natural speckles.
- Seal: Allow to dry 10–15 minutes before moving.
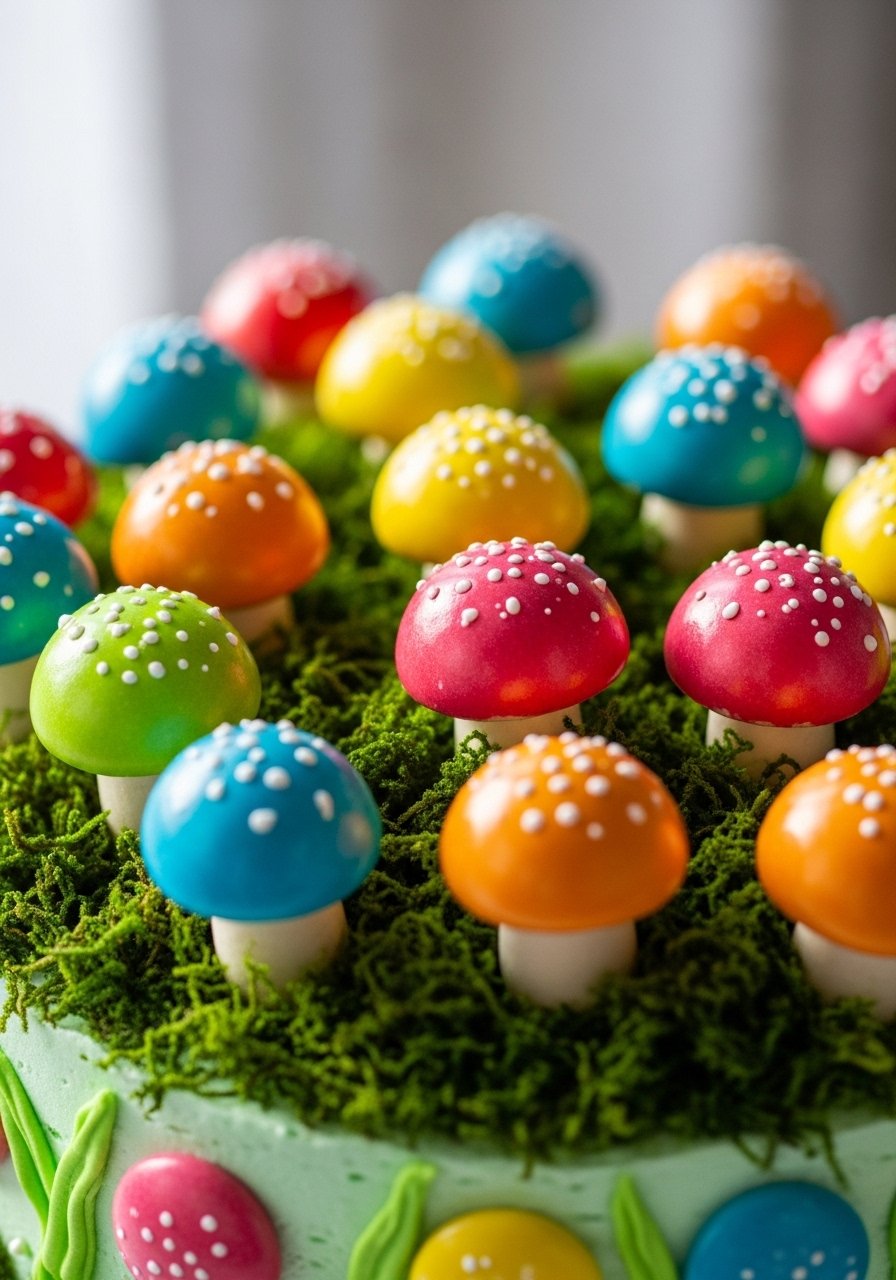
23. Edible Moss With Crumbled Cake
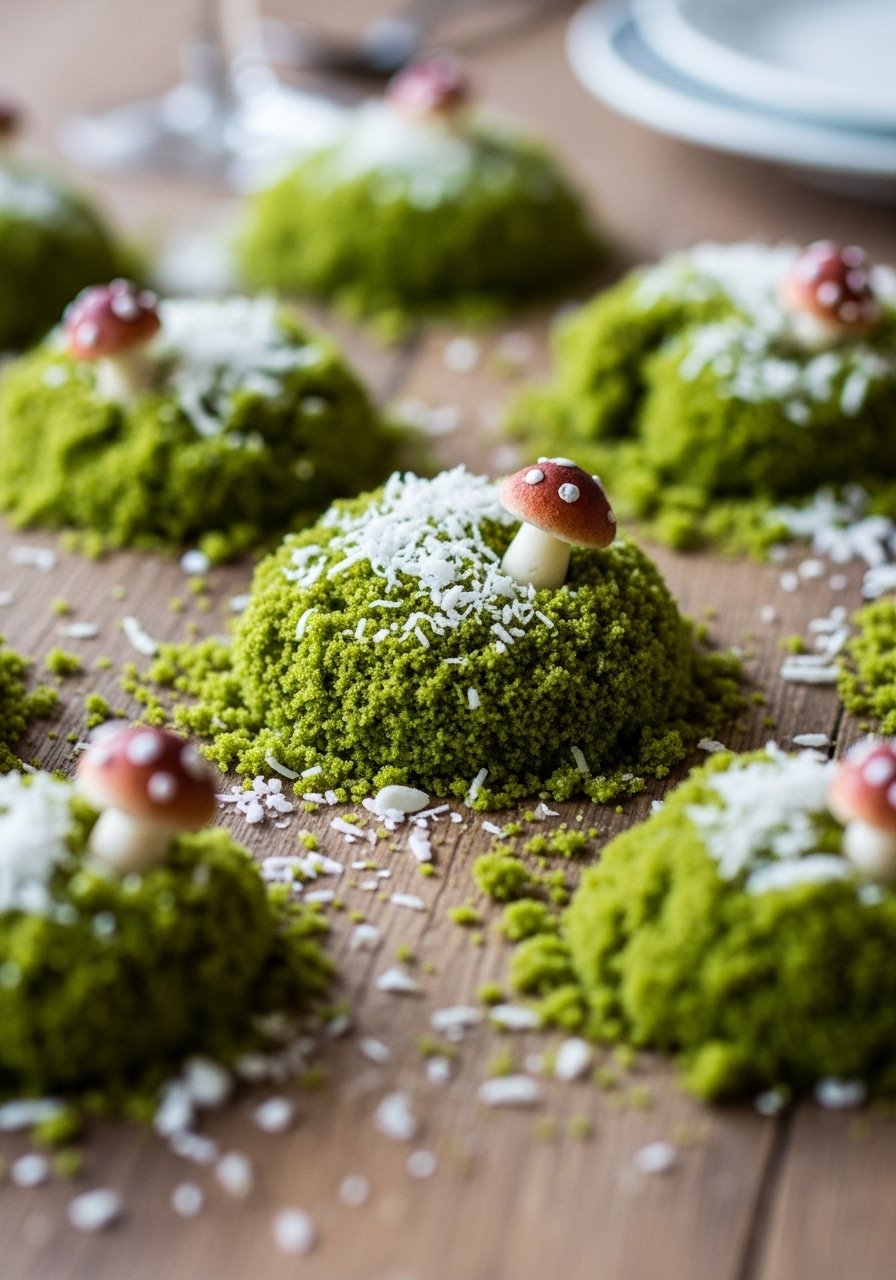
Edible moss complements mushroom decorations—made from crumbled cake and coconut for a realistic forest floor texture.
Ingredients
- 1/2 cup leftover cake crumbs (crushed)
- 2 tbsp desiccated coconut
- 1 tsp matcha powder or green food coloring
Step-by-Step Instructions
- Mix ingredients: Combine cake crumbs and coconut, add matcha or green coloring. Mix until even.
- Adjust color: Add more matcha for deeper green.
- Apply to cake: Press gently onto buttercream edges or around mushroom clusters.
- Fix in place: Use a light spray of simple syrup if pieces need to stick.
- Freshen: Make same day for best color and texture.
24. Caramelized Sugar Mushroom Caps

Show-stopping and delicate, caramelized sugar caps look like glass—use with care for a stunning centerpiece effect.
Ingredients
- 1 cup granulated sugar
- 1–2 tbsp water
- Silicone mats and heatproof spoon
Step-by-Step Instructions
- Make caramel: Heat sugar and water until amber (approx. 320–340°F or 160–170°C). Use candy thermometer.
- Pour caps: Spoon small rounds onto a silicone mat and shape quickly into domes with the back of a spoon.
- Cool carefully: Let cool completely—caps will harden and become glassy.
- Attach stems: Use a small dab of melted chocolate to affix stems.
- Handle with caution: Caramel is very hot—use heatproof gloves and keep away from children.
25. Marbled Fondant Mushrooms
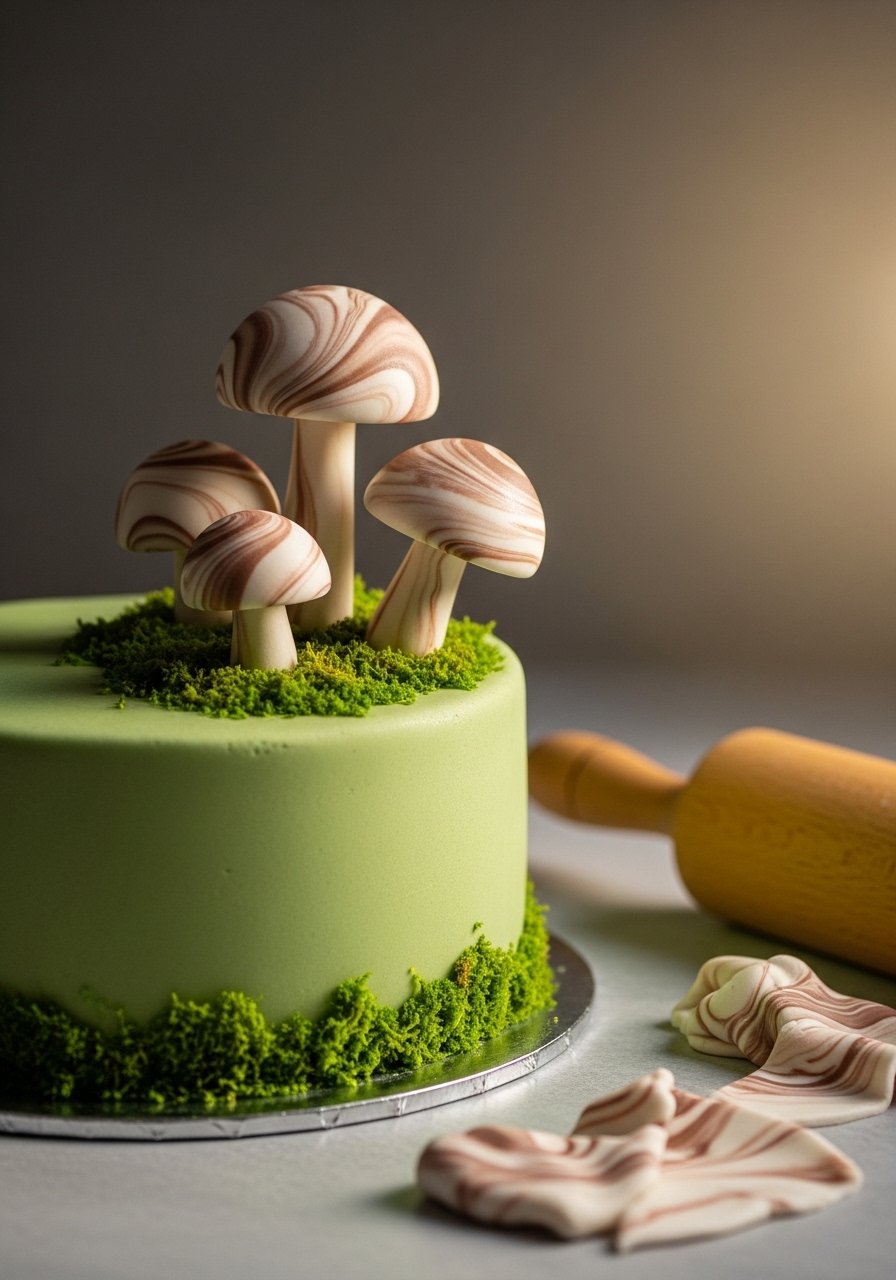
Marbled fondant creates elegant, natural-looking mushrooms with minimal effort—great for neutral, woodland palettes.
Ingredients
- 8 oz white fondant
- Small amounts of brown and beige gel colors
- Cornstarch for dusting
Step-by-Step Instructions
- Marble fondant: Twist small amounts of colored gel into white fondant without fully blending for marbled effect.
- Shape stems & caps: Form stems and caps from marbled fondant and assemble with toothpicks.
- Smooth joins: Use a tiny brush with water to smooth seams.
- Add matte finish: Dust lightly with cornstarch or petal dust.
- Dry: Allow 12–24 hours to firm for display.
26. No-Bake Cookie Cap Mushrooms
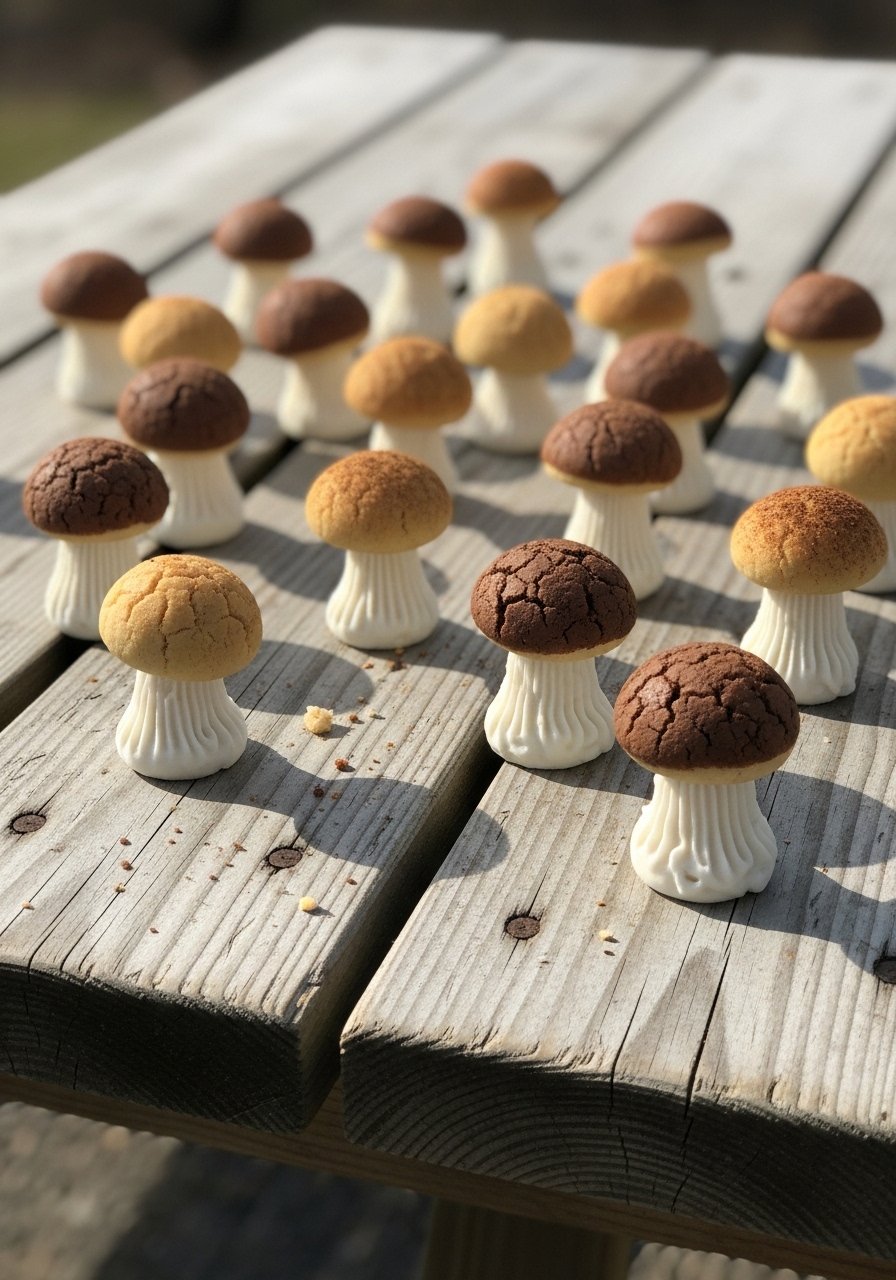
Quick no-bake option: use small round cookies as caps and pipe cookie-icing stems—fast and great for last-minute desserts.
Ingredients
- Small round cookies (e.g., vanilla wafers)
- 1 cup cookie icing or royal icing
- Piping bag with round tip
Step-by-Step Instructions
- Prepare icing: Fit a bag with round tip and fill with stiff cookie or royal icing.
- Pipe stems: Pipe small mounds of icing on parchment and let crust slightly.
- Mount caps: Press cookies onto the mounds gently to create caps.
- Decorate: Add piped white dots and let dry thoroughly.
- Place on cake: Attach with a small dab of icing.
27. Mini Chocolate Mushroom Truffles
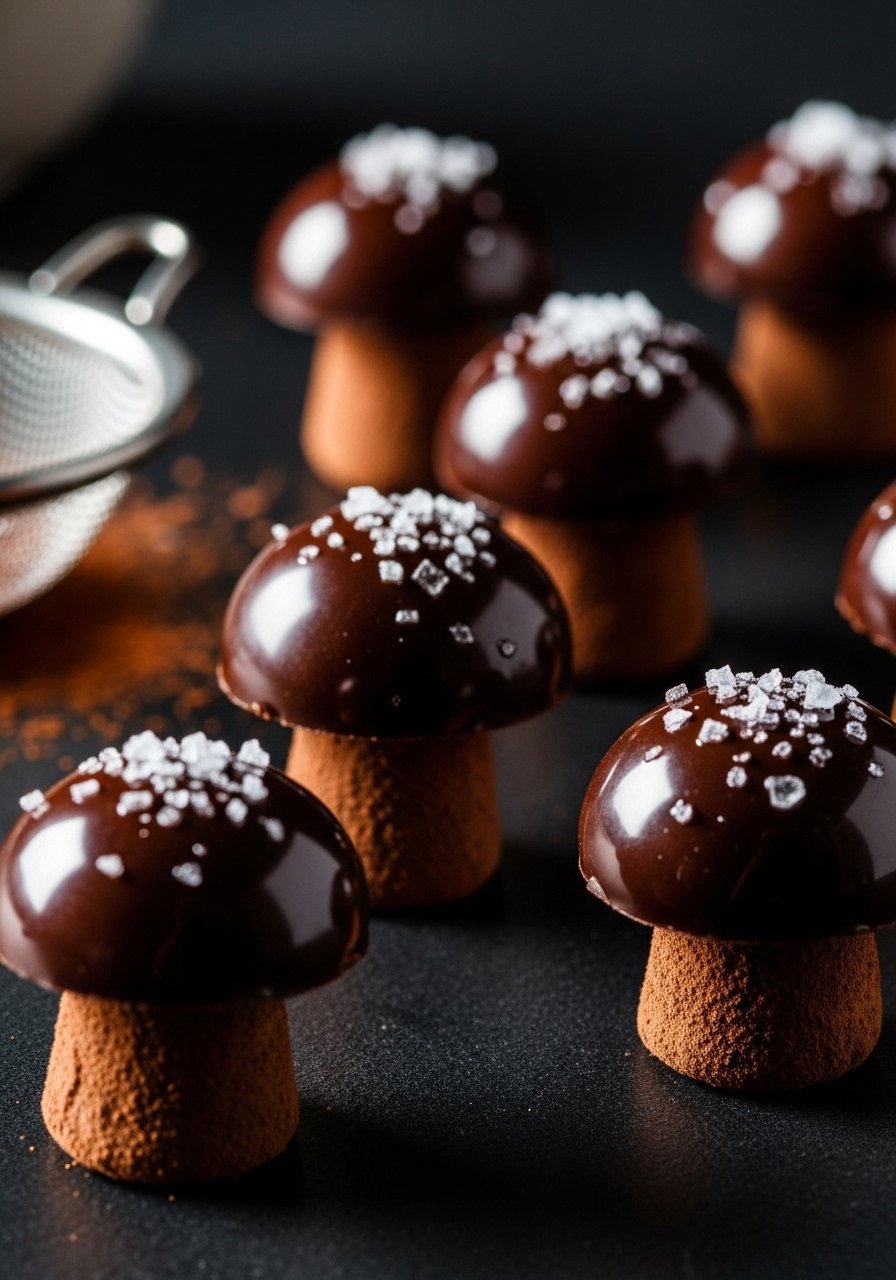
Rich truffle mushrooms are edible luxuries—perfect scattered around a cake for a grown-up twist on storybook treats.
Ingredients
- 8 oz dark chocolate
- 1/2 cup heavy cream
- Cocoa powder for dusting
- Melted white chocolate for stems
Step-by-Step Instructions
- Make ganache: Heat cream, pour over chopped chocolate, whisk until smooth. Chill until firm enough to shape.
- Form truffles: Scoop small balls for caps and slightly elongated ones for stems. Chill.
- Coat caps: Dip cap balls in tempered dark chocolate for a glossy finish.
- Assemble: Attach stem to cap with melted chocolate. Dust stems with cocoa powder.
- Chill & serve: Keep refrigerated until serving.
28. Piped Buttercream Rosette Mushrooms
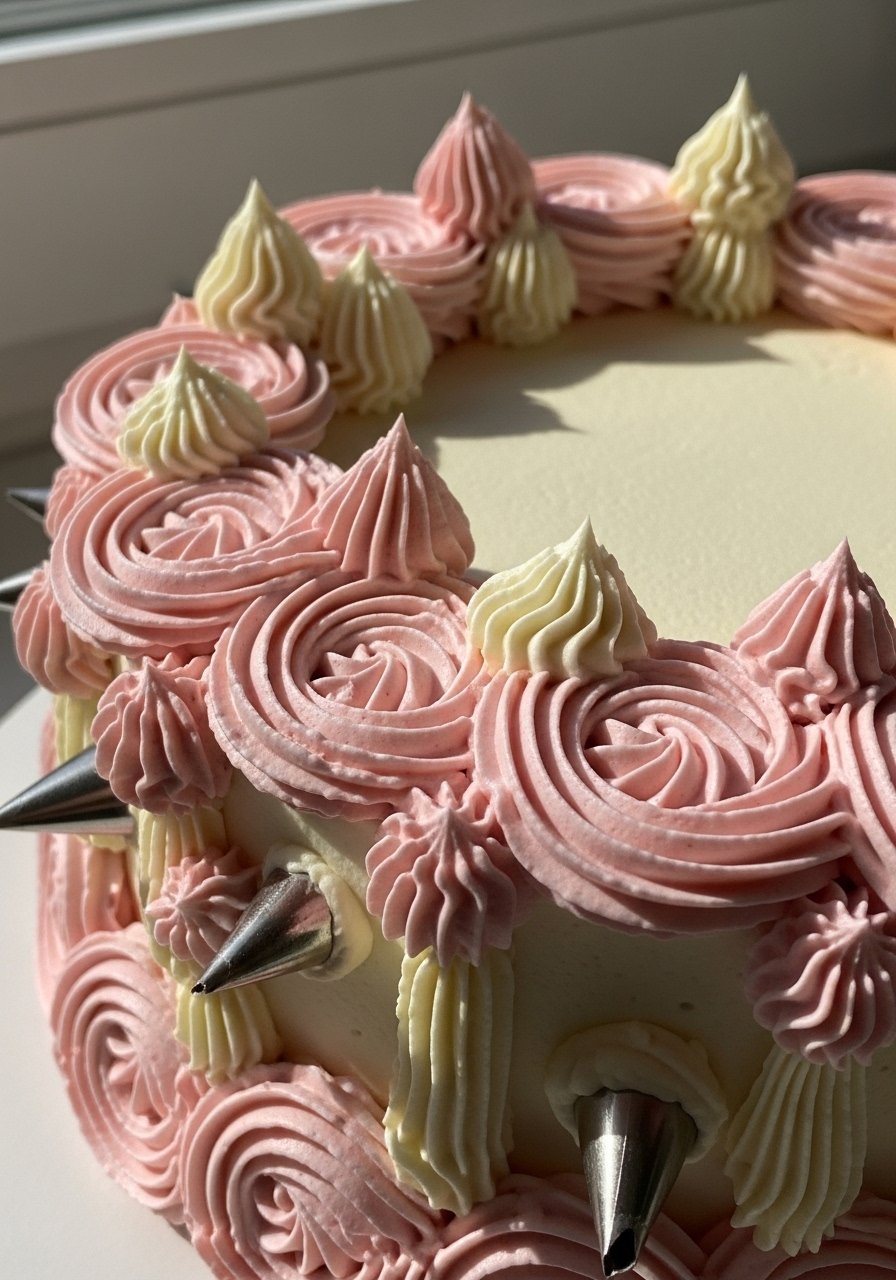
Swirled rosette caps are romantic and soft—ideal for feminine or boho storybook tables and easy to pipe with a star tip.
Ingredients
- 3 cups buttercream (medium stiffness)
- Gel food colors (optional)
- Piping bag with large star tip (#1M or #2D)
Step-by-Step Instructions
- Color buttercream: Tint portions as desired or leave white.
- Fill bag: Fit large star tip and fill with buttercream. Twist top to close.
- Pipe rosettes: Hold tip perpendicular and pipe tight spirals to form domes.
- Make stems: Pipe short columns separately and chill to firm.
- Assemble on cake: Place rosettes on stems with a small dab of buttercream as glue.
29. Chocolate-Covered Biscuit Mushroom Toppers
Simple and crunchy: dip biscuits into chocolate for caps and use white chocolate-coated mini biscuits or broken cookies as stems—fast and effective.
Ingredients
- Small round biscuits or cookies
- 8 oz dark chocolate for coating
- White chocolate for stems
Step-by-Step Instructions
- Melt chocolates: Prepare dark and white chocolate separately until smooth.
- Coat caps: Dip biscuits in dark chocolate and set on parchment.
- Prepare stems: Dip small cookie pieces or pretzel sticks in white chocolate and chill to set.
- Assemble: Attach stems under caps with melted chocolate as glue.
- Place on cake: Arrange in clusters or border the cake with these crunchy toppers.
FINAL THOUGHTS
You now have 29 mushroom cake decoration ideas ranging from speedy candy toppers to sculpted fondant showstoppers. Try a mix of textures—meringue, fondant, chocolate—for visual interest.
If you want help choosing tools, a few handy items are an Offset Icing Spatula and a Piping Tip Set. Have fun creating your storybook dessert table—each tiny mushroom adds a little magic.
Leave a Reply